Wednesday, June 30, 2010

Wordless Wednesday -- Gritty Jane

If you do any surfing for art dolls or any type of painting, you will no doubt come across Gritty Jane.  She has online doll making classes and is a very talented painter.  She has videos on YouTube where you get to watch her at work.  I love the texture and the subject matter in her painting, but I really love her art dolls.  I hope you do too.  Check out her site at grittyjane or at Gritty Jane

Here is just a peek at some of her work:


Enhanced by Zemanta

Tuesday, June 29, 2010

Tuesday Tutorial -- T-shirt rug

Everyone today is always talking about Green-this, or Green-that.  When I was growing up it was just repurposing out of necessity.   So, to show that I understand about greening and being frugal, here is a great tutorial about turning old t-shirts into rugs.  How recycled can you get?

_____________________________________________________________________________________

How to Crochet a Rug out of T-Shirts


Its easy to crochet a rag rug made from strips from old T-shirts.
This is all youll need to make your own upcycled rag rug.
Begin cutting at the bottom hem of the shirt. I cut this part half as wide since its two layers.
Its easy to crochet a rag rug made from strips from old T-shirts. It's easy to crochet a rag rug made from strips from old T-shirts.

It gives me a thrill to make something new, that's useful and beautiful, out of something old and unwanted. Oversized, corporate logo-ed T-shirts are a plentiful resource at your local thrift store or maybe even in your own closet. One of my favorite uses for them is to cut them into strips and crochet them into rugs, like your grandmother's old braided rag rugs but much easier to make!

You will need:
  • T-shirts (anywhere from two on up, depending on size rug desired), the bigger the better
  • Scissors
  • Giant crochet hook (I used 15 mm)


This is all you'll need to make your own upcycled rag rug.

1. Cut the shirts into strips, approximately 1 inch wide. Starting at the bottom, cut in a spiral all the way up the body of the tee, and roll the strip into a ball. Stretch it out as you wind so that the jersey curls up into a cord.


Begin cutting at the bottom hem of the shirt. I cut this part half as wide since it's two layers.


Wind the strip into a ball as you cut.

When you reach the armpits, cut right across the seams until you reach the edge of the sleeves and can't cut continuously anymore. I also cut part of my long strip into some shorter ones so that I can play with the colors.


You can work with long strips, wound into balls, as well as short strips, which will be prejoined for quick color changes.

2. Join the strips. If you're working with long strips wound into balls, you can just overlap the two ends for a few inches when you're ready to join on a new strip or to change colors. But if you want to join lots of short strips for quick color changes, you'll want to join them first so you don't have to keep stopping. Here's how I do it: Cut a small slit in the ends of the two strips you want to join, about 1/2 inch from the end and about 1/4 inch wide.

Go here to finish the tutorial and please leave a comment if you try this out.

Thursday, June 24, 2010

Thursday--Spa Day

Here's a really good and quick recipe to make your own lip balm.  This is something I use all the time and I know you will too.  I especially like the suggestion that you could make a non-color, non-scented balm to use on your cuticles.  I am off to try that.  Please click on the title link to visit the site this originated on.  Leave a message if you try this and like it.
______________________________________________________________________________

How to: Create your own lip balm recipe.

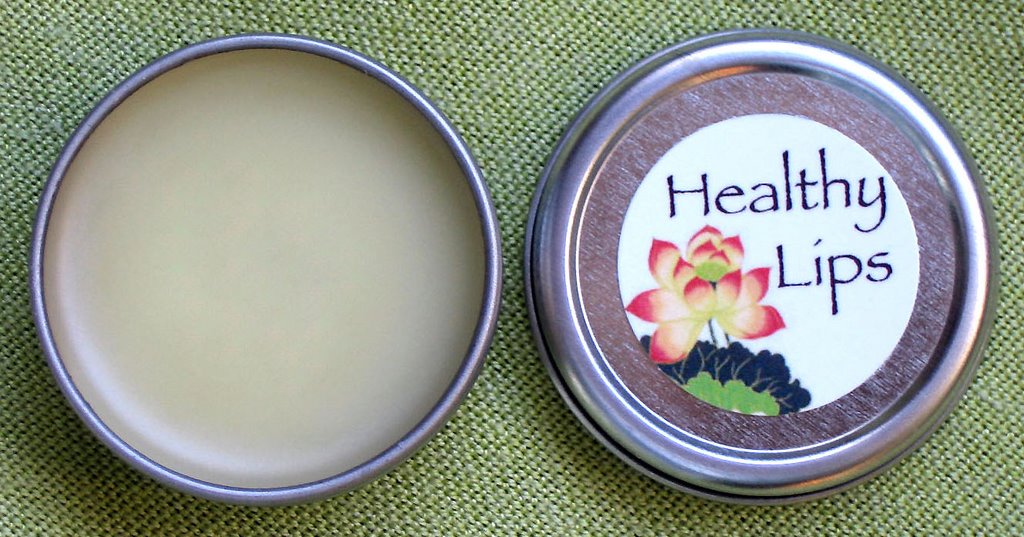
A couple of years ago I saw a great lip balm tutorial at Not Martha. I was very inspired by it and decided to create my own recipe. It was a little difficult finding information about what works best. After a lot of research, I compiled a list of what to do.

The Basics:

For a firm lip balm that can be used in a tube or tub, you will need a ratio of about 2:4 solids to liquids. Solids meaning wax & butters, liquids meaning oils. If you find your final product too thick, add more oils. If it is too thin, add more solids.


For solids, I use bee’s wax & mango butter. Other solids are also available.


For liquids, I use sweet almond oil, olive oil, castor oil, and avocado oil. Other types of liquids are available.

Put all of your ingredients in a double boiler and let them melt. Make sure to stir the mixture. Add essential oils just before you are ready to fill your tubes or tubs. This way they will not have a chance to evaporate.


When creating a recipe, be sure to write down the ingredients you have added to each batch including the measurement. I add ingredients a half teaspoon at a time until I get it right. Once you get it right, you will know just how much of each item you used. There will be no need to figure it all out again.


Equipment Needed:

• Stovetop
• Double boiler to melt ingredients in

• Measuring spoons
• Plastic pipettes (droppers) to help you pour melted ingredients into your tubes or tubs without spilling.
• Tubes or tubs to hold lip balm. I prefer to use metal tins instead of plastic because they have less of an environmental impact.
• Labels, if you plan to sell or give as gifts.


Where to shop:

There is a big selection of recipe’s at the Ponte Vedra Soap Shoppe. I shop at Majestic Mountain Sage. They have many exotic oils and good prices. Be sure to check the net because there may be a new company that has popped up that worthy of attention too. If you can’t wait to get started, and good health food store or Whole Foods Market will carry most of the ingredients you need.


About ingredients:
Castor Oil will make your balm glossy
.

Shea butter can be stinky and needs to be melted at a certain temperature. If you do not pay attention to this it will become grainy. Use mango or another type of butter instead.

Stay away from hydrogenated oils because they are unhealthy.


Vitamin E Acetate is an antioxidant and extends the shelf life of your product. Make sure to use it in every recipe. I use vitamin E oil that comes in gelatin capsules. They are easy to puncture and squeeze into the mixture.


If you prefer a sweet lip balm, add some honey.


If you like tinted lip balm, add some of your favorite lipstick to the mixture. If you want to experiment with making your own colors you can purchase Iron Oxide, Mica Powder, or D&C colors to add to the mixture. Mica Powders will add a shimmer to you final product.

Avoid artificial flavors. There are many natural essential oils that can be used which will increase your lip balm's healing potential.
About Essential Oils:
Use essential oils such as tea tree oil, rosemary, sage, peppermint, spearmint, anise, vanilla, cinnamon oil, camphor oil, lavender or ginger. A combination of any of these can be nice as well.

Tea tree oil is known for its antibacterial, antifungal and antiseptic qualities.

Camphor, and mints are cooling.


Cinnamon and ginger are warming.


Do not use any essential oils that are from the citrus family because they make the skin photosensitive.


About Labels:

If you want to make up your own labels, Dover Publications has a great selection of clip art available. You can sign up for free design samples that they e-mail to you about every other week.


Other uses for ‘lip balm’:
These balms are good for cuticles and hands, if you create one without color or sweetener. Balms are great if you work with PMC too, just as long as you do not use any petroleum products in your recipe.

Enhanced by Zemanta

Wednesday, June 23, 2010

Wordless Wednesday -- Mealy Monster Land

This is one of the first art doll sites I started following regularly.  Her monsters are so dang cute and her blog is just too entertaining.  I hope you will visit her and say "Hi".  Tell her I sent you.  Once you see her work, you, too, will become an avid follower I am sure!  Visit her at mealy monster land.

Here are just a few of her monsters:


Enhanced by Zemanta

Tuesday, June 22, 2010

Tuesday Tutorial -- Cobbler baked in jars -- Um, um, good!

I found this on a blog called Not Martha.  I know I usually post a craft tutorial here, but this looked too good to miss out on.  These are actually little individual fruit cobblers baked in half-pint jars with lids.  Who would ever have thought of this?  The recipe looks easy and quick, the pictures are great and I only wish I could have smelled the aroma of the results!  This is a great tutorial for school and church bazaars, for quick little presents to give friends, for a wonderful picnic luch, to pack in lunch boxes, etc.  I want to try this with apple (my favorite) or maybe with peaches.  I'm not much of a berry girl, but who knows, with this recipes I may have to convert.

Not Martha

to make: cobbler baked in jars


I made these for the Seattle Bake Sale for Share Our Strength organized by Frantic Foodie (thanks Keren!). I had so much fun making pies in jars that I figured this was the perfect opportunity to bake something else in jars. This time I used half-pint wide mouth jars, a nice size for a bake sale.

(Half pint jars washed and drying.)
I used the blueberry cobbler recipe from Baking Illustrated. I was making 24 portions so the first time I tried to divide each recipe [...read more...]

Please go here to see the post on these wonderful cobblers.  Leave her a message to tell her how yours turn out.  I know I will be doing so.  She also has a link to Pies in Jars you might try.
Enhanced by Zemanta

Tuesday, June 15, 2010

Tuesday Tutorial -- Toilet Paper Roll Wall Hanging

This is almost the same way I made my Christmas tree decorations, only I saw the procedure on the Carol Duval Show a long time ago.  I had a blast making these and they are really cute on my tree.  Here is a pic of how my snowflakes turned out.  Mine are white and dipped in glitter.


Recycled Toilet-Paper-Roll Wall Decor!

Toilet Paper Tube Wall Art On Blue2
I hope you've been saving those toilet paper rolls because this project is fantastic! But I can't take credit for the brilliant idea, that goes to my friend Tali the architect here. I've had this one on my agenda for ages and I've been diligently saving those rolls, and now I've got something special hanging in my kitchen. Yippee!
And I'm slowly chipping away at the list of recycled materials that I suggested you save. And toilet paper rolls can be stored collapsed and bound together with a rubber band if you're short on space!
This is a great project for all ages, and for those of you who'd like to get a head start on Succah decorations this would be perfect!
Toilet Paper Tube Wall Art On blue

My project is still in it's "natural" state, but I'm considering spray painting it gold. Then I have a feeling no one will guess it's humble origins!
You'll Need:
  • recycled toilet paper tubes, or paper towel tubes, lots of them!
  • white glue or a hot glue gun
  • lots of paper clips, if you're using white glue
Toilet Paper Tube Art How To
How To:
  1. Cut tubes into evenly sized rings. You do want the rings to be the same depth, so do take the extra time to measure! If you want to be a perfectionist, cut with a craft knife and a metal ruler.
  2. Start gluing tubes together. I used hot glue since it's quicker, but I'd recommend using the white glue and paper clips method for kids. Use the paper clips to hold the pieces together as they dry flat on a table.
  3. I really didn't have a plan so I decided to assemble flowers, and figure out what to do with them afterwards! You might want to actually design something first for more certain results. You could even plan your design on the computer!
  4. Run to the neighbors to see if they have some extra tubes, when you run out!
  5. Finish assembling your entire design and paint if desired. Hang and enjoy!
Reblog this post [with Zemanta]

Thursday, June 10, 2010

Thursday--Spa Day

Clark Sandal Skin Graft 6-28-09 1Image by stevendepolo via Flickr
Everyone has them, everyone uses them; but how many really take care of them?  Feet, I mean.
I think if more people took proper care of their feet, they would in turn become healthier and happier.
Nothing can ruin your day like feet that hurt.  No one likes to have dry, cracked skin on their feet.  Here are some Natural Foot Care Products for you to try:

The skin on your feet needs to be taken care of in the same manner as the skin of your face. You need to clean it, exfoliate it and moisturize it like you would any other part of your body. There are a number of foot care products available in the market. But you can make your own natural foot care products at home. These products are simple and easy to make and use naturally available material. Given below are a few simple recipes of natural foot care products.

Lime Cleanser

Ingredients:
  • Paper towels
  • Lemon juice
Take a bowl and mix half water and half lemon juice. Then dip paper towels into the mixture and apply on to your feet. This will soften, smooth and remove odors from your feet. This recipe does not contain preservatives and requires refrigeration. The shelf life of this product is approximately one week.

Strawberry Foot Exfoliator

Ingredients:
  • 8 strawberries
  • 2 tablespoons of olive oil or safflower oil
  • 1 teaspoon of kosher salt
  • ½ teaspoon finely chopped almonds
Mix all the ingredients together and make a paste of it. Do not blend too much as the strawberries have a lot of water and this will make the paste too watery. Massage it onto your feet, rinse off and dry your feet. This foot care product has no preservatives and has to be refrigerated. Shelf Life is about one week.

Relaxing Foot Lotion Recipe

Ingredients:
  • 1 tablespoon almond oil
  • 1 tablespoon olive oil
  • 1 teaspoon wheat germ oil
  • 12 drops eucalyptus essential oil or fragrance oil
Put all these ingredients into a dark colored bottle and shake it well. As and when you require rub into the feet and heels. Store in cool dry place. This recipe does not contain preservatives and requires refrigeration. Shelf life is approximately one week.

Make and use these simple natural foot care products at home and they will keep your feet healthy and beautiful.
These were found at this site along with many other recipes and tips for healthy, happy feet!
Reblog this post [with Zemanta]

Wednesday, June 9, 2010

Window Shopping Wednesday -- Noodle and Lou Studio

Here is an artist that I have been following for quite a while.  She does fantastic mixed media paintings and she loves vintage things.  Her blog is full of pictures of all types of vintage things.  She also makes the cutest little houses, called Lullettes.  I think the houses are what first caught my attention.  Anyway, here are some pictures of her work.  I invite you to visit here blog and go to her Etsy store to see her work.  I love it.  Her work is fun and happy.  You will find her at noodle and lou studio.
Aren't these just the cutest?


 She also makes really cute dolls:
Please visit her and leave her a message if you love her work as much as I do.
Reblog this post [with Zemanta]

Tuesday, June 8, 2010

Tuesday Tutorial -- Going Sew Crazy Clothespin Doll

Sometime last year, I found a really neat picture of sweet clothespin dolls that I really wanted to make but there was no tutorial.  I have kept looking since that time and I have finally found a tutorial that gives the same look and type of doll as the one I first saw. 

These look like lots of fun to make, seem simple enough, and probably won't cost you an arm and a leg.
I know I will be trying these out very soon.  When I do, I'll post my results here.

This tutorial is from Going Sew Crazy.
Please drop her a line and tell her how your dolls turned out.  I know I will.


 Mosaic7215424
I finally got this together! I am going to apologize first for the crappy photos. It has been horribly cloudy all day and I was working in my badly lit kitchen.
Supplies Needed:
-wooden clothespins
-wooden doll pin stands
-wooden dowel cap with 5/8" hole
-6 in. square of fabric
-small ribbon
-acrylic paint
-paintbrushes
-glue gun
-gloss varnish
-pencil
-small piece of flesh colored pipe cleaner
DSC_0001 copy
Steps:
-Draw face shape onto face with pencil.
-Paint face and top of pin in your choice of flesh color. Let dry. Repeat.
DSC_0004copy
-Paint pin stand and pin "legs". Let dry. Repeat.
-Paint hair onto dowel cap. Let dry. Repeat.
-Gloss varnish all parts. Let dry.
DSC_0009 copy
-Cut a 5" circle out of fabric. Cut a small hole in the middle and 2 small slits for the arms a bit down from the middle hole.
DSC_0014 copy
-Cut a small piece of flesh colored pipe cleaner and gluse to center back of clothespin.
DSC_0015copy
-Slip fabric over the "neck" of the pin. Slip "arms" into slits.
-Tie a small piece of ribbon around the waist and tie in a bow in the center back.
DSC_0024copy
-Glue head on doll and tilt to give it a sweet look.
-Glue doll pin into doll stand.
DSC_0037 copy
Some tips and tricks:
-Use tape or paper reinforcements on "legs" to make stripes or polka dots.
-You can leave the arms free or twist them together and glue something into the doll's hand. I used a mushroom in the pic above.
-You can also buy wooden spools and paint them and attach just the heads for fun trim and ribbon holders.
Let me know what you think! Have a great day ya'll!

Monday, June 7, 2010

Still working on the prayer dolls and other things

I have been in the middle of a terrible slump.  I don't want to finish anything.  I don't want to do anything.  I just sit and let the time pass me by. 

During this time of depression, I have managed to finish and give three of my prayer dolls away to my sister and my friends.  I have also managed to work on three more dolls, but they still need some work. 

I also started, but have not finished, an old friend.  Here are some pictures to show my progress, pitiful as it is.


Why Are Orcas Attacking Boats?

Recently I have been reading articles and news about Orcas attacking boats and causing quite a bit of anxiety.  Since these whales hunt in p...