Showing posts with label Paper. Show all posts

Tuesday, August 17, 2010

Tuesday Tutorial -- brenna’s paper capiz shell chandelier

This is in the catagory of "Oh my God!"  This is just too beautiful to believe.  I hope someone has a place they can hang such a beautiful chandelier and they make this because I am dying to know if it turns out just as beautiful as this picture.  Maybe when I move to a new house, I will get to try this.  I certainly hope so.

This is from Design Sponge and there are many other wonderful DIY items also.
____________________________________________________________________________________

i love wax paper for packing lunches; i wrap sandwiches in a piece of wax paper and tie it like a present with a little cotton string. it’s so much better looking than a
plastic bag. wax paper comes in handy for more things than i realized, like rolling it up to use for a funnel, or how about rubbing a piece of wax paper on the top of your
shower curtain rod to cut down on that terrible screeching in the morning…problem solved. but who knew that if you iron layers of wax paper together it looks remarkably similar to a capiz shell? this discovery brought me to today’s project: the faux capiz chandelier. hung over your dining table, or outside at an outdoor dinner party, it is an easy solution to a dramatic light fixture and will look phenomenal in either setting. i hope you enjoy making your own as much i did! -brenna


Materials:
- hanging planter basket
- white spray paint
- ribbon
- scissors
- 1-2 rolls wax paper
- 2 big pieces of parchment paper
-  iron
- hot glue gun & glue sticks
- circle cutter (i didn’t have any luck with a “punch”)
- cutting mat
Instructions:
1.  spray paint your planter basket. let dry.

2.  start making the capiz shells. lay out the two pieces of parchment paper on your ironing board or on a clean dish towel on the floor or table. (if you use your floor or
table, just make sure it wont be damaged by the heat of the iron)
3.  cut three pieces of wax paper about the same length. mine were about 18”. sandwich the three pieces of wax paper between the parchment paper. the parchment paper allows the wax to stay within the layers of paper, helps it stick together, and gives the wax paper a smooth finished surface.
4.  iron the paper sandwich on a low setting. remove the layered wax paper from between the parchment, and repeat.
5.  set the circle cutter to cut 2 ½ inch circles. with the circle cutter, cut circles from the layered wax paper on your cutting mat. it helps to tape the wax paper down to
the mat.

6.  cut ribbon pieces and attach the ribbon to the planter basket. the length of the ribbon will depend on the method of attachment to the basket… (single or double strand). my lengths were between 7 (single) and 16 inches (doubled). you can attach them to the basket either by hot gluing the end of a single strand to the basket wire, or by folding the ribbon in half, and creating a knot over the wire. start at the bottom, and work your way up.

7.  once you finish one tier of ribbon, attach the capiz shells to the ribbon with a tiny dot of hot glue near the top of each shell. i alternated two and three shells on each ribbon and only attached shells to every other ribbon. overlap the shells by about ¼”. finish an entire lower tier, then move on to the next higher tier.

8.  once you cover the hanging basket you are done! you can attach a simple bulb of you want this to be a source of light. hang in your desired location, stand back and
admire.


CLICK HERE for the full how-to after the jump!


Materials:
- hanging planter basket
- white spray paint
- ribbon
- scissors
- 1-2 rolls wax paper
- 2 big pieces of parchment paper
-  iron
- hot glue gun & glue sticks
- circle cutter (i didn’t have any luck with a “punch”)
- cutting mat
Instructions:
1.  spray paint your planter basket. let dry.

2.  start making the capiz shells. lay out the two pieces of parchment paper on your ironing board or on a clean dish towel on the floor or table. (if you use your floor or
table, just make sure it wont be damaged by the heat of the iron)
3.  cut three pieces of wax paper about the same length. mine were about 18”. sandwich the three pieces of wax paper between the parchment paper. the parchment paper allows the wax to stay within the layers of paper, helps it stick together, and gives the wax paper a smooth finished surface.
4.  iron the paper sandwich on a low setting. remove the layered wax paper from between the parchment, and repeat.
5.  set the circle cutter to cut 2 ½ inch circles. with the circle cutter, cut circles from the layered wax paper on your cutting mat. it helps to tape the wax paper down to
the mat.

6.  cut ribbon pieces and attach the ribbon to the planter basket. the length of the ribbon will depend on the method of attachment to the basket… (single or double strand). my lengths were between 7 (single) and 16 inches (doubled). you can attach them to the basket either by hot gluing the end of a single strand to the basket wire, or by folding the ribbon in half, and creating a knot over the wire. start at the bottom, and work your way up.

7.  once you finish one tier of ribbon, attach the capiz shells to the ribbon with a tiny dot of hot glue near the top of each shell. i alternated two and three shells on each ribbon and only attached shells to every other ribbon. overlap the shells by about ¼”. finish an entire lower tier, then move on to the next higher tier.

8.  once you cover the hanging basket you are done! you can attach a simple bulb of you want this to be a source of light. hang in your desired location, stand back and
admire.

Blog Widget by LinkWithin
Enhanced by Zemanta

Tuesday, June 15, 2010

Tuesday Tutorial -- Toilet Paper Roll Wall Hanging

This is almost the same way I made my Christmas tree decorations, only I saw the procedure on the Carol Duval Show a long time ago.  I had a blast making these and they are really cute on my tree.  Here is a pic of how my snowflakes turned out.  Mine are white and dipped in glitter.


Recycled Toilet-Paper-Roll Wall Decor!

Toilet Paper Tube Wall Art On Blue2
I hope you've been saving those toilet paper rolls because this project is fantastic! But I can't take credit for the brilliant idea, that goes to my friend Tali the architect here. I've had this one on my agenda for ages and I've been diligently saving those rolls, and now I've got something special hanging in my kitchen. Yippee!
And I'm slowly chipping away at the list of recycled materials that I suggested you save. And toilet paper rolls can be stored collapsed and bound together with a rubber band if you're short on space!
This is a great project for all ages, and for those of you who'd like to get a head start on Succah decorations this would be perfect!
Toilet Paper Tube Wall Art On blue

My project is still in it's "natural" state, but I'm considering spray painting it gold. Then I have a feeling no one will guess it's humble origins!
You'll Need:
  • recycled toilet paper tubes, or paper towel tubes, lots of them!
  • white glue or a hot glue gun
  • lots of paper clips, if you're using white glue
Toilet Paper Tube Art How To
How To:
  1. Cut tubes into evenly sized rings. You do want the rings to be the same depth, so do take the extra time to measure! If you want to be a perfectionist, cut with a craft knife and a metal ruler.
  2. Start gluing tubes together. I used hot glue since it's quicker, but I'd recommend using the white glue and paper clips method for kids. Use the paper clips to hold the pieces together as they dry flat on a table.
  3. I really didn't have a plan so I decided to assemble flowers, and figure out what to do with them afterwards! You might want to actually design something first for more certain results. You could even plan your design on the computer!
  4. Run to the neighbors to see if they have some extra tubes, when you run out!
  5. Finish assembling your entire design and paint if desired. Hang and enjoy!
Reblog this post [with Zemanta]

Monday, April 19, 2010

Making Paper Beads for fun

Here's a tutorial on how to make paper beads.  I think we all may have made these before as children, but they are still fun to make and can actually become very beautiful jewelry or accessories to crafts.  Besides, they are all unique and handmade by you!  Enjoy.

How to Make Paper Beads

Make Paper Beads
Make Paper Beads
Kate Pullen
Paper beads are simple to make and a few rubber stamping techniques are all that is required to make beautiful and unusual beads. The basic technique can be adapted in many ways to achieve different effects. This is also a good way to use up odds and ends of paper. Even the most unpromising looking paper can make striking beads.

Template

You don't need to follow a template, however a simple template is attached if required. The template has been designed specifically for rubber stamping. Instead of tapering to a point, there is a small strip that is just wide enough to display some rubber stamping. By varying the size and shape of the paper, very different bead designs can be created.

Beads in the Picture

From left to right:
  • Bead created from paper that has been stamped, with a row of glitter glue dots along each edge
  • Bead created from a scrap of paper that has been colored with alcohol inks and over stamped
  • Piece of scrapbooking paper that has been stamped in a complementary colored ink
  • Basic paper bead created from a piece of stamped paper
  • Bead created from scrapbooking paper and vellum that were stamped and stuck together before rolling
  • Bead created from paper used as packaging

Supplies Required

  • Paper
  • Rubber stamps, inks, embossing powders, glitter glue and any other embellishments
  • Scissors
  • Craft adhesive, any adhesive suitable for paper will be work well
  • Thin knitting needle or cocktail sticks
  • Diluted pva glue to seal the beads (optional)

Paper Bead Projects

Paper Bead Template

Paper Bead Template
Paper Bead Template
Kate Pullen
To print the template, simply click on the image above to open the full size version of the template. Then right click on that image and select 'Save Image' to save onto your computer. Print as required.

See the following pages for instructions explaining how to make paper beads.

Stamp and Decorate the Paper

Stamp the Desgin
Stamp the Paper
Kate Pullen
Stamp and decorate the unprinted side of the paper. This way the printed lines will not show. A rubber stamp with a detailed and intricate design will work well. Repeatedly stamp the rubber stamp over the page to build up a dense design. Cut the bead shapes from the paper.

Tip: Ink the edges of the paper. This will emphasize the design of the bead and give a more 'finished' effect.


Roll the Paper

Roll the Bead
Roll the Bead
Kate Pullen
Glue the back of the paper and carefully roll the bead. I use a thin knitting needle to roll the bead around, this helps to give a consistent result. Cocktail sticks or other thin and round implements would work equally well.


Seal the Paper Beads and Finish

Paper Beads
Paper Beads
Kate Pullen
Make sure the end of the paper is firmly attached, add an extra dab of glue if required. Leave the beads to one side to dry. I like to seal my paper beads with a coat of diluted pva glue. This adds strength and gives the paper beads a slight gloss. They could also be finished with a coat of clear varnish, embossed with embossing powders or even coated in resin. Other ideas for sealing the finished beads include coating the beads in melted UTEE or adding a coat of nail varnish.

Add any other finishing touches such as stick on jewels or other embellishments. Have fun using the beads!
Reblog this post [with Zemanta]

Sunday, March 14, 2010

Here is a post I found on The Polka Dot Pixie and thought it was a perfect repost for Easter.  So, here it is complete with instructions and pictures to make the cutest little chick.  Make several and give them to your kids, your neighbor's kids, your grandkids, whatever.  Maybe just make some for yourself.  This is so cute!

Please visit The Polka Dot Pixie blog, too, because there are really great posts to be found there!
Happy Crafting!  Happy Easter!

__________________________________________________________________________________


  In case anyone wanted to sculpt their own little party chick ... here is the way I made him. To begin, you will need paper clay, sculpting tools, water, a small flat paintbrush and a Styrofoam egg and ball, paper tape and 20 gauge floral wire.
Begin by twisting and shaping wire into bird feet and legs. Cover with paper tape.

Soak Styrofoam egg in water and then cover with paper clay, smoothing and shaping with your hands and paintbrush. Insert legs into bottom of egg, and pose in any fashion you choose. 
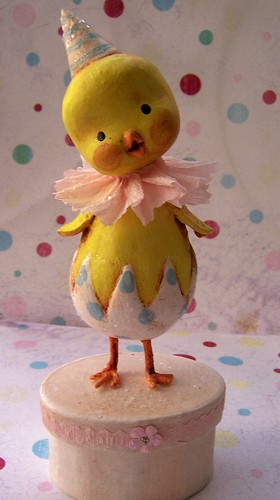
Indent Styrofoam ball with smooth barreled paint brush handle or a smooth barreled pencil. Shape Styrofoam to create a head shape.
Soak Styrofoam head in water and cover with paper clay forming a smooth surface with hands and brush.
To create the face, form two small balls and 2 small cone shapes. Flatten balls in to "puffy pancakes" and attach to head, one on each side, to create cheeks.
Attach cone shapes to create beak. Smooth face with paintbrush and water. Shape beak with sculpting tools and paintbrush to create a smile.
Using paper clay, create a small barrel shaped neck to attach head to body. Smooth with paintbrush and water.

Adding a wire here also adds extra strength to your piece. You can tilt the head to the side to add some personality.


Shape wings and attach to chick body with paintbrush and water.


I didn't take pics of the painting process, but I recommend that you let the chick dry for a least week before painting. I always gesso paper clay before painting with good quality acrylic paints, and finish the pieces up with a matte acrylic sealer, which is then antiqued with watered down burnt umber paint. After I attached this chick to a hand painted paper mache box, I added just a touch of glass glitter here and there to give him a little sparkle.


I hope you have fun with your creations! If you decide to make one I'd love to see the finished pics!

Here is a link to the original post
Reblog this post [with Zemanta]

Why Are Orcas Attacking Boats?

Recently I have been reading articles and news about Orcas attacking boats and causing quite a bit of anxiety.  Since these whales hunt in p...