Showing posts with label Paper. Show all posts

Tuesday, December 8, 2009

Ribbon Tree Holiday Cards

here's another quick idea for some last minute, hand-made Christmas cards.  I might leave out the quilling if I was going to be mailing them, otherwise, these are really beautiful and quite easy.  Even the kids could have a go at making these cards!

If you do try them, let me know how it goes and what you think, won't you?


*******************************************************************************
CRAFT: Celebrate the Season

By Ann Martin
Are you planning to make cards to send this holiday season, but running out of time? Or perhaps you've been toying with the idea of giving paper quilling a try, but have hesitated because you think it must be too complicated? Worry not ... these retro ribbon trees go together quite quickly. The 3D quilled scrolls add a bit of extra dimension, but if really pressed for time, you could omit them and still have a pretty card.

Materials:

Cardstock: green, ivory, white, and glossy red
Velvet paper, dark green
Ribbon, 14" long, metallic, 3/8" wide
Printer and tree template
Quilling paper, white, 1/8"
or use computer paper and cut 1/8" strips with a paper cutter
Quilling tool, slotted
Paper cutter
with scoring blade
Double stick tape or glue stick for mounting layers
Glue, clear drying, suitable for paper
Plastic lid
Ruler
Scissors
Tweezers

Ribbontree Treetemplate
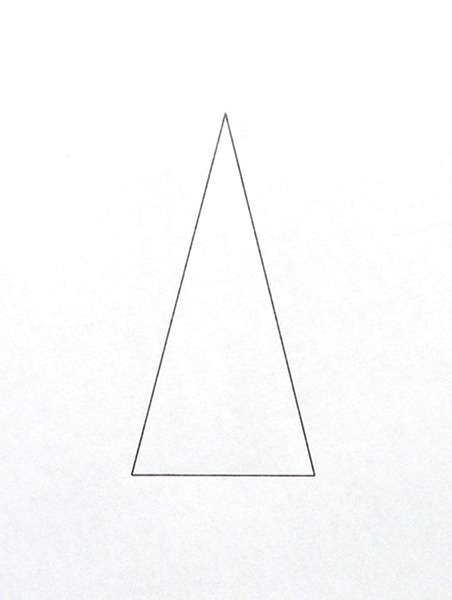
Download and print the tree template.

Directions for the Red Card:

Ribbontreecardred Step1
Step 1: Prepare a green card blank by cutting cardstock to make a 5½"×8½" rectangle. Score and fold the 8½" length at the midpoint to make a card that measures 4¼"×5½".
Step 2: Cut a 3"×5" rectangle of glossy red cardstock. Center and glue it on the card.
Trimmingribbon Step3B
Step 3: Print out the tree template. Adjust the size to make a tree that measures 2¼"×4¼". Cut out the tree, trace around it on white cardstock, and cut out.
Glue strips of ribbon diagonally across the tree, allowing a little extra at each end. It's easiest (and you'll get the cleanest cut) if you wait until the glue has fully dried before trimming. Then turn the tree over and trim the excess ribbon. Glue the tree on the card, allowing room below it for the quilled stand.

Rollingcoilonslottedtool Step4A
Step 4: Insert one end of a 4" quilling strip into the slot of a quilling tool. Turn the tool with one hand and guide the paper with the other to make a rolled coil. Stop rolling at the halfway point and slip the coil off the tool.
Cscroll Step4B
Repeat with the other end of strip, rolling it toward the midpoint to form a C. Make 2.
Step 5: Glue a 1" strip of quilling paper on top of another 1" strip, creating a double thickness.
Step 6: Make a glue palette by spreading a thin puddle of glue in a plastic lid. Pick up a C coil with tweezers, touch its underside to the glue, and place it on the card. Repeat with the second C scroll, turning it over so it faces the opposite direction. Glue the 1" strip at the bottom of the 2 C scrolls as the base.

Directions for the Green Card:

Ribbontreecard Green
The ivory/green card is nearly identical to the green/red one, except for using a 3¾"×5" rectangle of dark green velvet paper on an ivory card and a slightly larger tree template (2½"×4¾").
Cscrollasymmetric
The quilling gives just the suggestion of a tree stand. Make an asymmetric C scroll by rolling one end slightly past the midpoint of a 4" strip, so that one coiled end is larger than the other. Make 2.
Mailing Tip: Is it possible to send a quilled card through the mail without the quilling getting crushed? Yes! Cut a square of bubble wrap and place it over the quilling before sliding the card into a regular envelope or use a bubble wrap mailer. You might also want to include a piece of cardboard behind the card to prevent bending. And if you're really daring, considering how busy the post office is at this time of year, take the cards there and ask to have them hand cancelled.
About the Author:
Author Annmartin
Ann Martin of all things paper is a quilling enthusiast who loves introducing the craft to others. She teaches, designs projects for books and magazines, and is especially hooked on making paper filigree jewelry.
Reblog this post [with Zemanta]

Tuesday, November 24, 2009

Make your own Christmas Cards

Holiday Greeting CardImage by Salon de Maria via Flickr
I used to always make my own cards for special occasions.  My grandsons have quite a collection that they proudly display in their rooms going back to when they were very small.  I've made cards for my family for years.  This year I was thinking about making my own Christmas cards to give to my friends, since I don't usually give gifts to anyone except the boys.

I really enjoy making cards.  It is very relaxing to do and opens up your creativity.  I usually find myself looking at the calendar for the next big occasion while I am working on cards for the present occasion.

Below is directions for creating a lovely Christmas card.  Try it out, you might find that you love making cards.  Beware, though.  You may find yourself addicted!


_______________________________________________________________________________

Joy Greeting Cards

Craft Project - Joy Greeting Cards
By Linda Peterson

Materials

AMACO® Craft Porcelain Modeling Material
AMACO® Rub ‘n Buff® — Gold Leaf
Loew-Cornell Water Color Crayons
Black Card Stock
Grey Paper
Decorative Papers in Colors of Choice
#2 Rounded Tip Clay Shaper
Fiskars Paper Edgers — Deckle Paper
Glue of Choice.
Helpful Hint: Keep a small bowl of water and paper towels handy. Wrap craft projects in wet paper towel to keep it from drying out.
Step 1
Letters are created by rolling a ball of clay into a log and shaping it into the desired letter. When dry to the touch, apply Rub ‘n Buff®. Note: The size of the ball determines the size of the letter.
Step 2
Holly berries: Roll 3 small balls.
Step 3
Leaves: Roll a ¼” ball into a teardrop and flatten. Feather edges of leaves until they are thin. Draw in veins with clay shaper.
Step 4
Place three leaves together. Paint green with watercolor crayons. Paint berries red and apply over top of leaves.
Step 5
Cut Black Cardstock:
# 6″ x 12″ (fold in half)
# 3″ x 3″
# 2¾” x 2¾” (cut edges with deckle scissors)
# 1½” x 5½” strip
Step 6
Cut Grey paper:
# 2⅞;” x 2⅞”
# ½” x 5½”
Step 7
Layer the paper using the picture as a guide. Add mullbery paper to top of square. Glue on holly embellishment and letters. Highlight edges of paper with Rub ‘n Buff®
Step 8
Add interest by varying the size of the card such as in the second sample. Embellish the letters with holly leaves or other flowers of choice.
Reblog this post [with Zemanta]

Monday, November 23, 2009

Creating Paper Clay, "Santas" for your tree or holiday decorating

Here is an Christmas craft I found but can't figure out how to get the pictures to copy.  So, I have copied the instructions below and included the link to the original posting PDF so you can see the pictures.

I have started making some of these and will be showing you the progress as I go along.  So far, all I have done is make the actual Santa's parts out of clay and have been drying them.  Here is what I have so far:


___________________________________________________________________________________
Inexpensive and original!

See the original instructions here so you can view the pictures!

Instead of baubles, cute dangly Santas and red hearts could be hanging on your Christmas tree this year! They're really easy to make using air-drying modelling clay. A creative Christmas craft idea - great fun to make with children too!

Material:

Paper clay (sufficient for approx. 15 Santas or for approx. 18 hearts), 1 kitchen knife, 1 tile or piece of smooth film to serve as a work surface, several transparent sleeves for drying on, 1 reel of wire, 1 pair of pliers, several toothpicks and skewers for modelling with, 1 rolling pin for rolling out with, 1 heart-shaped pastry cutter, 1 pair of scissors, string, 1 bowl, 1 box of paints, several paint brushes for painting with and a moist cloth.

Step l:

Roll the paper clay out to an approx. 5 mm thick sheet. Place a triangular-shaped template for the Santas on the sheet, outline the form onto the paper clay using a wooden stick and then cut out with the knife.
If you want to make hearts, simply cut the hearts out of the sheet of clay with the pastry cutter. Smooth all edges with water!

Step 2:

Hangers are inserted into the hearts straight away. Make them out of wire which you shape by wrapping around, e.g., a pencil. Leave the finished hearts to dry for one day on transparent sleeves. After half of the time, turn the hearts over so that the backs dry as well.

Step3:

Now it's time to transform the cut-out clay triangles into Santas. Note: before adding details, moisten the triangle first with water! First make a thin sausage out of clay which you then use for the fur edging along the bottom of the coat and the hat. For the eyes, place two tiny balls directly underneath the bottom of the hat and add pupils to them using the toothpick. Now attach an oval-shaped pug nose. A hint of a beard is added by drawing several lines with the wooden stick. Don't forget to make the holes for the dangly legs and hanger! If you want, you can give your Santa a handsome moustache. Simply press it on directly under the nose and add a whisker structure using the wooden stick. For the dangly legs, roll out an approx. 7 mm thick
clay sausage and cut into 1.5 cm long pieces. Make holes through the individual pieces using the wooden skewer, leaving you with elongated pearls. All finished parts are then left to dry for one day on transparent sleeves. Turn over every now and again to ensure that they dry evenly and that the Santa shapes don't bow.


Step 4:

The dried hearts are then painted all over with red paint from the paint box. Use a fine paint brush to give the Santas a rosy pink nose and cheeks. To do so, dilute the red paint very well. The hat and coat are painted red. Beard, face and fur edging stay white. Paint the pearls for the boots using black paint out of the paint box. Once the paint is dry, push a piece of string through the two holes on the bottom edge of the Santa (looks like a belt), thread a pearl onto each end of the string and tie a knot in the bottom. Another piece of string threaded through the hole in the hat and knotted at the end serves as a hanger.

Have Fun Making Them!


Tips:
Always wrap bits of Paper Clay that get left over while you're working in a moist cloth to prevent them from drying out, so that they can be used again later. Even when taking a short break in your work, cover the not yet finished pieces with a moist cloth.

Wrap open packs of paper clay well in cling film and keep in an air-tight plastic box. This keeps the clay soft for several days.

Make sure that the holes you make for the string in the Santa and pearls are large enough! Should the holes be too small, you can make them larger after hardening using a small electric drill!


Reblog this post [with Zemanta]

Tuesday, November 17, 2009

Here's a look at why I like paper mache!

This artist has the most enjoyable and whimsical creations.  Please browse through the galleries and see if you don't agree.  This really is why I love paper mache, it's so versatile.

I love that you can take a medium available anywhere, that children can use to create, and make these gorgeous sculptures.  If you do an online search, you will find many paper mache artists out there whose works are unbelievable!


Here is the link to view PapierDog
Reblog this post [with Zemanta]

Wednesday, November 4, 2009

One look at these silly characters explains why Laurie Hardin insists her job doesn't feel like work

Here is an article about one of the artists that I follow closely.  I love her work and find her ability to be so creatively productive envious.  She has a definite look to her work and I find her dolls to be both pleasing to look at as well as cheerful and fun.

Please read this article about Laurie Hardin, she is being featured in her local paper, but I think she deserves more exposure than just local exposure.  I am sure you will agree with me that her work is delightful!
You can visit the original work here>>
_____________________________________________________________________________________
Photo by: Sarah Mulder, Kearney Hub
Laurie Hardin paints details on a Halloween figurine. Hardin first saw the idea of Halloween figurines while watching HGTV.

KEARNEY - When Laurie Hardin was brainstorming names for her studio, she didn't have to look very far for inspiration - it was lying right on her studio table.
Hardin's two youngest cats always find a place to carefully walk, lay, play and even get a drink of water on her studio table. Hardin refers to them as her "studio boys," while her husband, Kelly, referred to them as "monkey boys" when they were little because their tails were, and still are, extremely long.
"When I was going to come up with a name and they kept being on my studio table, it just stuck," Hardin said.
Among the paintbushes, paint and figurines on the studio table is a container, once used to clean paintbrushes, with fresh water for the cats to drink. The cats' food, water and toy bowls are tucked safely underneath her table. They even have a special chair to jump onto when trying to get on Hardin's work area.
Hardin's Monkey-Cats Studio features hand-painted and hand-sculpted figurines inspired mostly by Hardin's favorite holiday, Halloween.
"Some people do really dark things, but mine are a bit more whimsical," she said.
Hardin said she saw the idea to make sculpted Halloween figures while watching HGTV one afternoon.
"What I started doing is making my own Halloween figures," she said, noting her initial goal was to make a shelf full of figures for herself.
Hardin admits the first figures she made were disastrous.
After she found a clay she liked that looked like old-style papier-mache, she started showing the figures to her friends.
And then she taught some classes on how to make them.
Then she sold some figurines at a craft show two years ago.
Now, she is in her fourth year of making figurines and recently took 62 pieces to a Halloween show in California called Halloween and Vine. She came home with only seven pieces.
"Halloween and Vine was huge for me," she said. Hardin even had to turn down orders for figurines because she is already about a dozen orders deep.
Before making figurines full time, Hardin, who has bachelor's and master's degrees in art, worked full time. She told her husband she wanted to paint landscapes full time for one summer.
During that summer, she received a couple commissioned pieces, and when she was done, she told her husband she would find work. But instead, she started selling her pieces at craft shows.
She said about a year ago, she realized she could make a living off her artwork.
"It's just been a wonderful thing. I've been so happy doing it," she said.
Hardin said she gets her ideas for figurines through drawings in her sketchbooks.
"I don't ever have a problem with ideas," she said. "Every time I run out of ideas, I just flip through these."
After picking out a figurine to create from her sketchbooks, she mixes clay, which she orders in 25-pound boxes, and works it by pinching or rolling it out. She covers a styrofoam figure with the clay, adds wooden dowels for legs and lets it air dry for about a week. Hardin said it usually takes her about eight hours to sculpt the figure.
After the clay is firm, she primes and paints the object, sometimes putting on eight to 10 coats of paint.
"My surfaces are never one coat of paint," she said. "I like what it does to the surface."
Hardin likes the fine details on her figures, all the way down to sharp points on the stars.
"I will go through paintbrushes like crazy," she laughed. Poking out of a large container on her studio table are new high-detail brushes. Any time those paintbrushes are on sale, she said, she picks up a bunch.
Hardin said she has about four return Kearney customers for the figurines, with more customers in Omaha and Lincoln.
However, almost everything she makes goes out of state. She ships many figurines to California or the East Coast.
"I didn't know when I first started that there were serious, serious, one-of-a-kind collectors," she said, noting a lady in Pennsylvania has more than 20 figurines.
In addition to craft shows, Hardin also sells the figurines through an online market place called SpookyTime Jingles and through eBay auctions.
Hardin also creates figurines for other holidays, but most have a Halloween twist.
"Even my snowmen kind of look Halloween-ish. I don't do that on purpose," she laughed.
Hardin said she will make about 130-140 figures this year and sells about six pieces per month.
"I just feel blessed to be able to do this. It doesn't feel like work," she said. "This is what I need to be doing."
e-mail to:
sarah.mulder@kearneyhub.com
Reblog this post [with Zemanta]

Why Are Orcas Attacking Boats?

Recently I have been reading articles and news about Orcas attacking boats and causing quite a bit of anxiety.  Since these whales hunt in p...