After this holiday and my weekend at work, I find I am in serious need of some "Me-time". I found this video on hand care and I liked it so much I subscribed to the whole series of videos. They are really good. I plan on starting at the top and working my way down, pampering myself the whole time!
Monday, April 25, 2011
Wednesday, April 20, 2011
I finished the Easter Swag
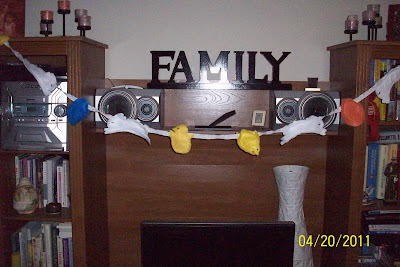
Well, I finished, but I have to say I am less than impressed. I think I just got tired of it and stopped. Anyway, below is a picture. I'm taking it to my unit tomorrow and putting it up so at least there will be some evidence that Easter is this weekend for my patients.
If I make this again, I will make the figures larger and probably stuff them lightly with fiberfill before attaching them to the ribbon. I wish I had more time, I would have loved to decorate the Easter eggs and put blanket stitching around the figures to "pop" them out.
Live and learn. On to the next project. Mother's Day is coming. I don't think I will make anything for this holiday. But, maybe some paper flowers in a vase set around the unit would be nice.
Anyway, here is the picture of the completed swag:

Tuesday, April 12, 2011
Tuesday Tutorial -- Magnetic Words from CreativeHomeArtsClub
I am still working on my Easter swag and hope to finish all the hand sewing this week, but until I have more pictures, I thought this tutorial was cute and easy. Maybe you could use this somewhere at home or at work to brighten up the day.
____________________________________________________________________________________

____________________________________________________________________________________
| ||||||||||||||||||||||||||||||||||||||||||||||||
| Finished Size: Approx. 8" - 10" Skill: 1 Time: 1 Cost: 1 SAFETY TIP: Mom and Grandma – please supervise the painting in a well-ventilated area but do the cutting with the craft knife yourself. You will need: • One 8" metal stove burner cover • One 10" metal stove burner cover • Spray paint*: Primer, Perfect Pink, Basil • Coordinating scrapbook paper • 2 1/2" chipboard letters to spell, "H, O. P, E" and "D, R, E, A, M" • Ten 1/2" button magnets* • One pkg. 1/2" x 4" adhesive magnetic strips* • Ten 5/8" buttons in assorted colors • Ten white silk flowers in assorted sizes • 19" of 3/8" brown gingham ribbon • 10" of 3/8" pink ribbon • 10 1/2" of 3/8" tan polka dot ribbon • Tacky glue* • Glue stick* • Craft knife* & cutting mat*, emery board, newspapers, ruler, sandpaper, scissors * The following products were used for this project: Design Master Color Tool Spray Color • Elmer's Craft Bond Tacky Glue & Extra-Strength Glue Stick; X-Acto Gripster craft knife & cutting mat • Magnum Magnetics ProMAG Button Magnets and Adhesive Strips Magnets. Note: For product information, see end of article. • Craft knife should be used only by an adult. • Use glitter spray only outside or in a well-ventilated area. • Allow all paint and glue to dry between steps. • See photo for details and placement. STEP 1: Prepare stove covers. Protect work surface with newspapers. Lightly sand stove covers to dull surface Spray with primer. Spray small cover Perfect Pink. Spray large cover Basil. Use additional coats if needed. STEP 2: Attach ribbon. Measure and cut ribbon to go across covers as shown. Use glue stick to attach. STEP 3: Prepare letters. Plan which paper to be used for each letter. Apply glue stick to fronts of letters and attach paper. Turn letter paper side down on cutting mat. Have adult use craft knife to cut away excess paper around each letter. Use outward strokes to gently sand letter from paper to edge all around letters. This technique creates a white, distressed look and secures paper to letter. Note: Use emery board in tight spaces of letters. Cut and attach adhesive magnet strip to back of each letter. STEP 4: Finish. Use tacky glue to attach buttons to centers of silk flowers. Glue button magnets to backs of flowers in same way. Sources: Design Master (303) 443-5214 dmcolor.com Elmer's Products, Inc. (888) 435-6377 elmers.com Magnum Magnetics Corporation (740) 568-3721 magnummagnetic.com | ||||||||||||||||||||||||||||||||||||||||||||||||

Monday, April 4, 2011
Here's and update on my Easter crafting
I am steadily working on this Easter swag. I am really enjoying the work and I think it will be really pretty once done. I have scaled down my finished product some, so the work does not feel too overwhelming.
Anyway, here are some pictures of where I am on the project. It is starting to really turn out nice and I can't wait to be hanging it up on my nursing unit. I hope it brings some cheer to my patients.

Anyway, here are some pictures of where I am on the project. It is starting to really turn out nice and I can't wait to be hanging it up on my nursing unit. I hope it brings some cheer to my patients.
 |
| Here's the mess I've left out |
 |
| Starting to look like something |
 |
| This is the pattern that repeats |
 |
| Seems a little flimsy so more work needed |
Monday, March 28, 2011
Still working on Easter decorations
Although I am still working feverishly on my own Easter Swags for the windows in my nurses' station at work, I don't have any new pictures because I split the cutting out of my figures with my friend, Bethany. She is going to help me because I need so many figures to make a swag for each window.
Because I don't have anything new on my swag, I thought I would post this tutorial from Dana-made-it.com. She has many wonderful tutorials on her site, so please visit and let her know that I sent you.
-----------------------------------------------------------------------------------------------------------------------------
 If you've got a Sunday morning brunch up your sleeve.....
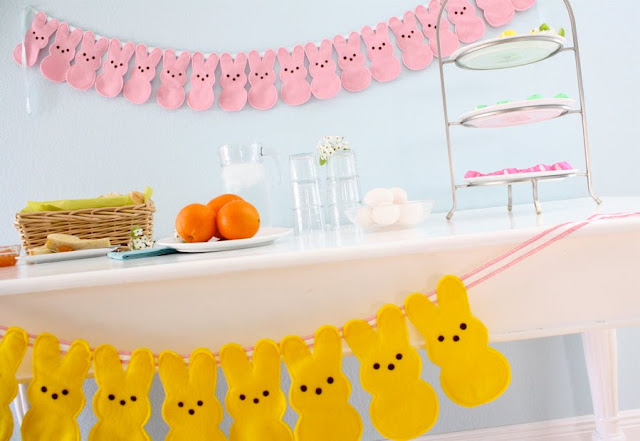
 Don't forget the PEEPS!

 Nothing says Easter like a bunch of colorful bunnies.
 And since buntings are festive any time of the year, I took a spin on the traditional flag look and mimicked a childhood favorite in our family.....Marshmallow Peeps.
 Pick your favorite Peeps color (or make up your own!) and find a similar FELT color at your local craft store. Then, keep it super simple with Bunny Door Hangers:
 or really give-in to your sweet tooth.....
 And let's get bunting!

Skill Level: Any
Needed:
* 1/2 yard or less of felt (doesn't need to be anything fancy)
* brown fabric paint
* pencil (or other round object)
* ribbon/fabric for bunting
* sewing machine
First, cut out your pattern. I've created one here for you. If you don't have a printer, just put a piece of paper up to your computer screen and trace the image right on top!
or.....
You can copy the Bunny Bunting Pattern TWO ways:
1. Click on the image below to enlarge. Then "save as" to you computer. Open it in a Word doc and insert the picture so you can adjust the size for your needs.
2. Grab the PDF pic by clicking HERE.
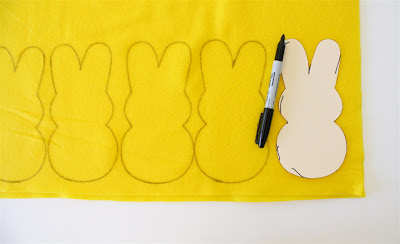
 Okay, with your bunny pattern printed and cut out (I usually print on paper and then trace/cut an additional pattern out of cardstock or from a file folder. MUCH easier to trace around a stiffer bunny over and over again).
Fold your felt in half (because each bunny is a double-layer). You can make them single layered if you want the cheap/easy way. But it's less polished looking and a bit see-through. So I recommend double-layers.
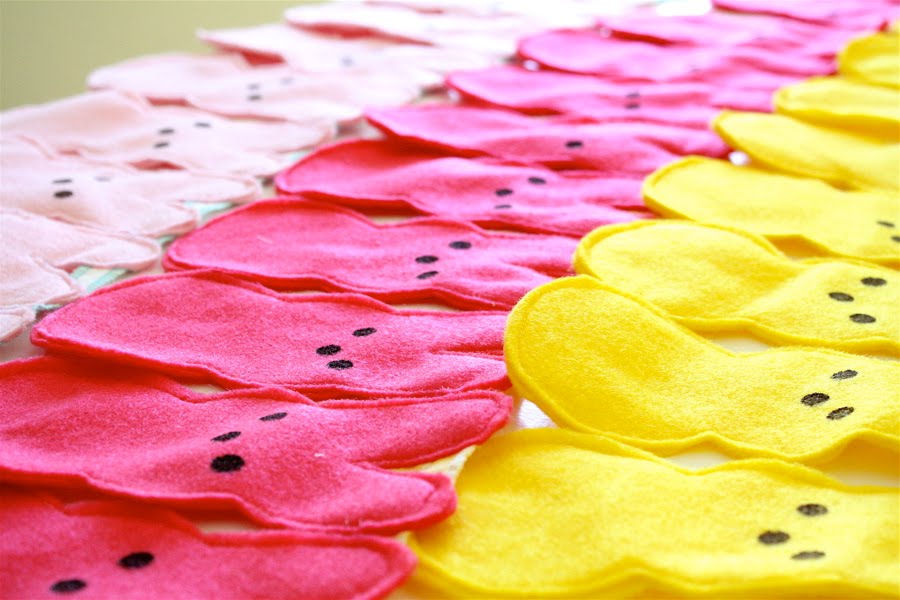
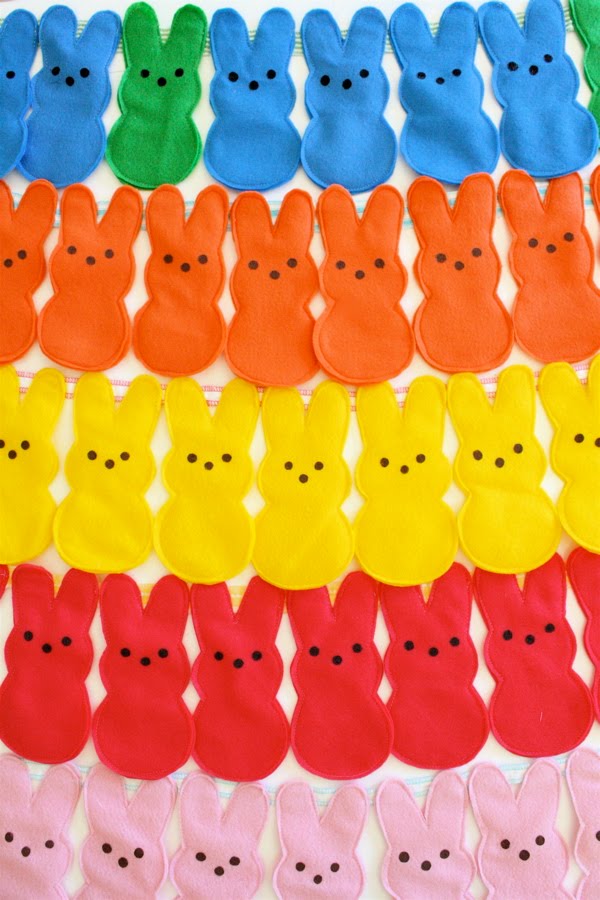
Then trace and cut out as many bunnies as you'd like. The pink bunting has 18 bunnies. The small yellow bunting has 9:
 Time to decorate their faces. You'll only be decorating the front bunnies (the back bunnies are left plain). You'll need a pencil eraser or something round. And brown fabric paint. I prefer Tulip brand, Matte, Chocolate. Its cheap, $1.50 at most craft stores.
 Dip your pencil eraser in the paint, and dab it right onto each bunny. The beauty of Peeps is that they're far from perfect. If you look at a box, each face is slightly different. So don't worry about being precise or even symmetrical! If you want them to look like the real Peeps, space their eyes very far apart. It will feel strange. But their eyes are far apart and their nose if very high-up, close to the eyes. Look at the photos above of the real peeps for reference.
Make sure you place a piece of paper under your bunny because paint may seep through to the back.
 Starting to see a resemblance......?

 Let your bunnies dry for a hour or longer. If you're antsy, you can speed up the process by drying them with a blow dryer, but be careful that they don't fly all over the place!
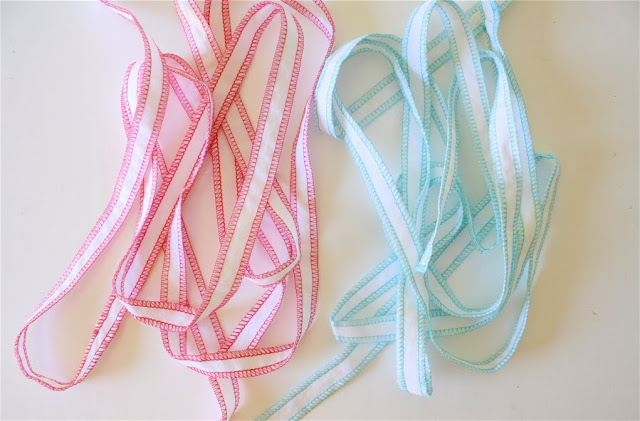
While you're waiting for the faces to dry, prep your bunting ribbon. You can use fabric, ribbon, rope, colorful twine (THIS stuff is totally cute). My favorite method for making "ribbon" is to cut strips of fabric (I used double-layered white muslin in this case), sew the strips together to make a very long strip, and then I serge the edges. Perfect for wrapping gifts and in this case, for making a bunting. Each finished "ribbon" is about 100 inches long but that was much longer than needed.
 Time to sew on your bunnies.
If you want the quick and easy way, grab a bunny back and a bunny front and sew that double-layered bunny to your ribbon and keep on going till you're bunnied out.
But if you want the slightly longer method that I did (it only took a bit longer)...
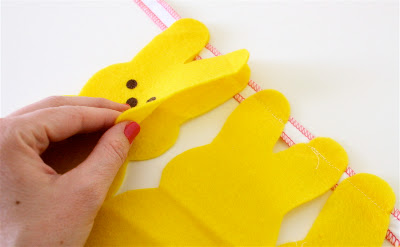
I sewed each bunny back on to the ribbon while the faces were drying. Just lay one down and sew across the ears:
 Then grab the next bunny back and repeat:
 Sewing the backs on first makes the bunting a bit stronger, the bunnies are likely to be straighter, and it's more polished looking. After sewing the back bunnies on by their ears, you sew the front bunnies on top, sewing an outline around each one.
(Okay, okay...so I was just bored and couldn't wait to get started while those blasted faces were drying! Either method you use, your bunnies will look great.)
 Here's where I laid the front bunnies on top of the back bunnies and sewed all the way around each one. Repeat this step till all your bunnies are on!

 and, you're done!
 Enjoy your party!
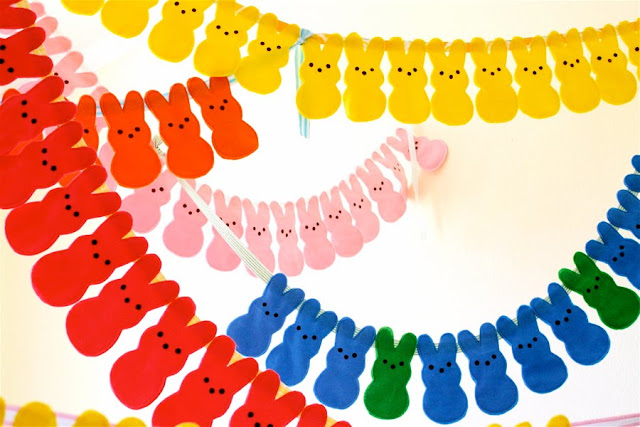
 Try your buntings in vibrant colors also. Makes me want to throw confetti and eat cupcakes:

 Or make Bunny Door Hangers! Perfect gift for a teacher or friend:
Just add a metal Eyelet to the ear and a cute homemade ribbon (if you're not sure how to do Eyelets, they are super easy. Check out the Split Pea Shamrocks Tutorial for all the info):
 And hang them up!
 Happy Easter!


Because I don't have anything new on my swag, I thought I would post this tutorial from Dana-made-it.com. She has many wonderful tutorials on her site, so please visit and let her know that I sent you.
-----------------------------------------------------------------------------------------------------------------------------
7.01.2008
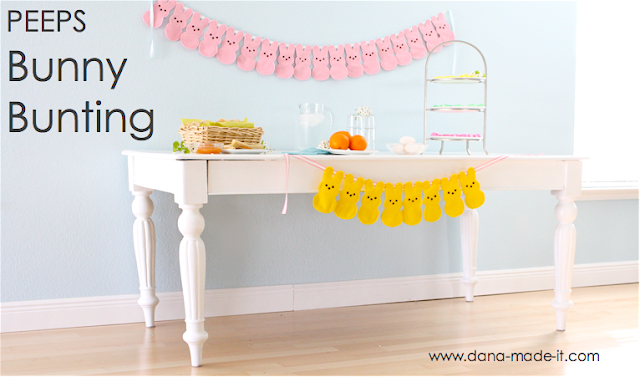
TUTORIAL: PEEPS Bunny Bunting and Door Hangers
Ready for Easter? If you've got a Sunday morning brunch up your sleeve.....
 Don't forget the PEEPS!
 Nothing says Easter like a bunch of colorful bunnies.
 And since buntings are festive any time of the year, I took a spin on the traditional flag look and mimicked a childhood favorite in our family.....Marshmallow Peeps.
 Pick your favorite Peeps color (or make up your own!) and find a similar FELT color at your local craft store. Then, keep it super simple with Bunny Door Hangers:
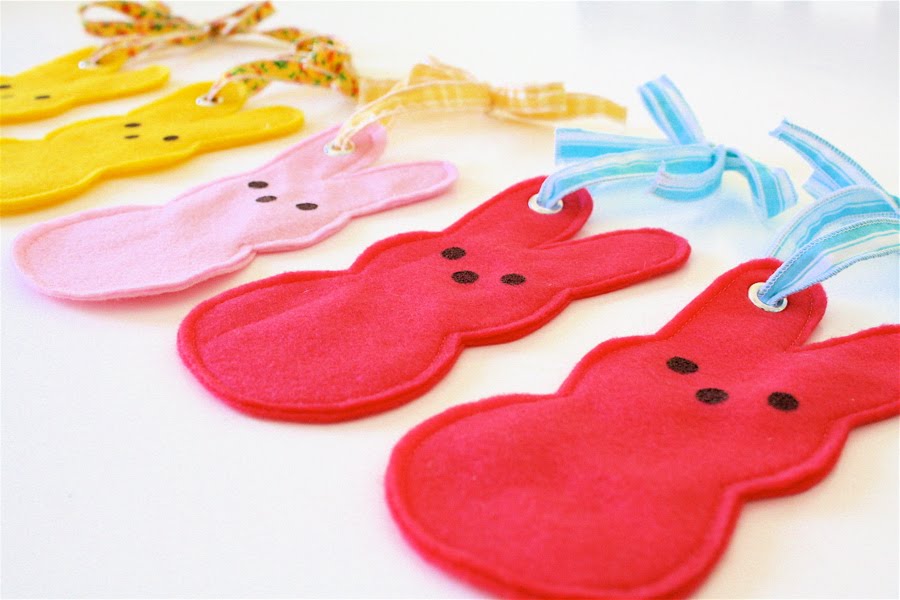 or really give-in to your sweet tooth.....
 And let's get bunting!
Skill Level: Any
Needed:
* 1/2 yard or less of felt (doesn't need to be anything fancy)
* brown fabric paint
* pencil (or other round object)
* ribbon/fabric for bunting
* sewing machine
First, cut out your pattern. I've created one here for you. If you don't have a printer, just put a piece of paper up to your computer screen and trace the image right on top!
or.....
You can copy the Bunny Bunting Pattern TWO ways:
1. Click on the image below to enlarge. Then "save as" to you computer. Open it in a Word doc and insert the picture so you can adjust the size for your needs.
2. Grab the PDF pic by clicking HERE.
 Okay, with your bunny pattern printed and cut out (I usually print on paper and then trace/cut an additional pattern out of cardstock or from a file folder. MUCH easier to trace around a stiffer bunny over and over again).
Fold your felt in half (because each bunny is a double-layer). You can make them single layered if you want the cheap/easy way. But it's less polished looking and a bit see-through. So I recommend double-layers.
Then trace and cut out as many bunnies as you'd like. The pink bunting has 18 bunnies. The small yellow bunting has 9:
 Time to decorate their faces. You'll only be decorating the front bunnies (the back bunnies are left plain). You'll need a pencil eraser or something round. And brown fabric paint. I prefer Tulip brand, Matte, Chocolate. Its cheap, $1.50 at most craft stores.
 Dip your pencil eraser in the paint, and dab it right onto each bunny. The beauty of Peeps is that they're far from perfect. If you look at a box, each face is slightly different. So don't worry about being precise or even symmetrical! If you want them to look like the real Peeps, space their eyes very far apart. It will feel strange. But their eyes are far apart and their nose if very high-up, close to the eyes. Look at the photos above of the real peeps for reference.
Make sure you place a piece of paper under your bunny because paint may seep through to the back.
 Starting to see a resemblance......?
 Let your bunnies dry for a hour or longer. If you're antsy, you can speed up the process by drying them with a blow dryer, but be careful that they don't fly all over the place!
While you're waiting for the faces to dry, prep your bunting ribbon. You can use fabric, ribbon, rope, colorful twine (THIS stuff is totally cute). My favorite method for making "ribbon" is to cut strips of fabric (I used double-layered white muslin in this case), sew the strips together to make a very long strip, and then I serge the edges. Perfect for wrapping gifts and in this case, for making a bunting. Each finished "ribbon" is about 100 inches long but that was much longer than needed.
 Time to sew on your bunnies.
If you want the quick and easy way, grab a bunny back and a bunny front and sew that double-layered bunny to your ribbon and keep on going till you're bunnied out.
But if you want the slightly longer method that I did (it only took a bit longer)...
I sewed each bunny back on to the ribbon while the faces were drying. Just lay one down and sew across the ears:
 Then grab the next bunny back and repeat:
 Sewing the backs on first makes the bunting a bit stronger, the bunnies are likely to be straighter, and it's more polished looking. After sewing the back bunnies on by their ears, you sew the front bunnies on top, sewing an outline around each one.
(Okay, okay...so I was just bored and couldn't wait to get started while those blasted faces were drying! Either method you use, your bunnies will look great.)
 Here's where I laid the front bunnies on top of the back bunnies and sewed all the way around each one. Repeat this step till all your bunnies are on!
 and, you're done!
 Enjoy your party!
 Try your buntings in vibrant colors also. Makes me want to throw confetti and eat cupcakes:
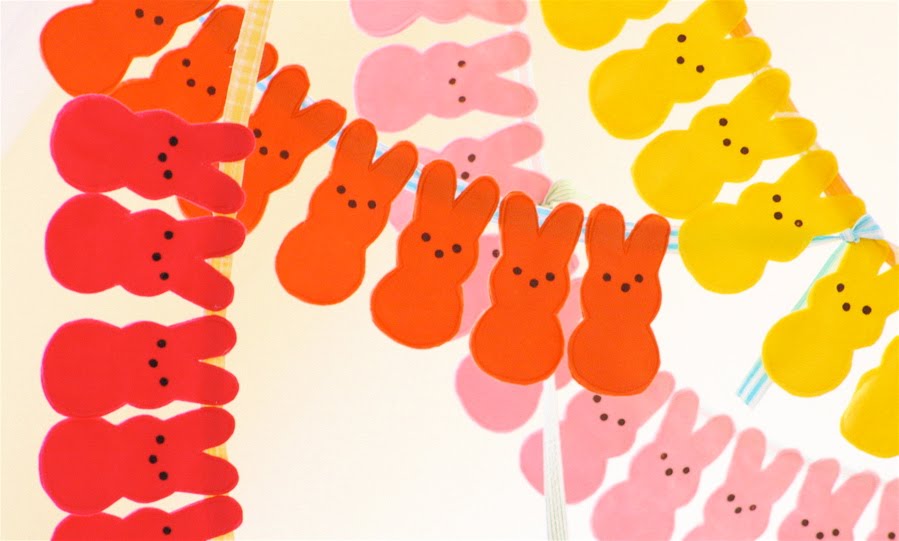
 Or make Bunny Door Hangers! Perfect gift for a teacher or friend:Just add a metal Eyelet to the ear and a cute homemade ribbon (if you're not sure how to do Eyelets, they are super easy. Check out the Split Pea Shamrocks Tutorial for all the info):
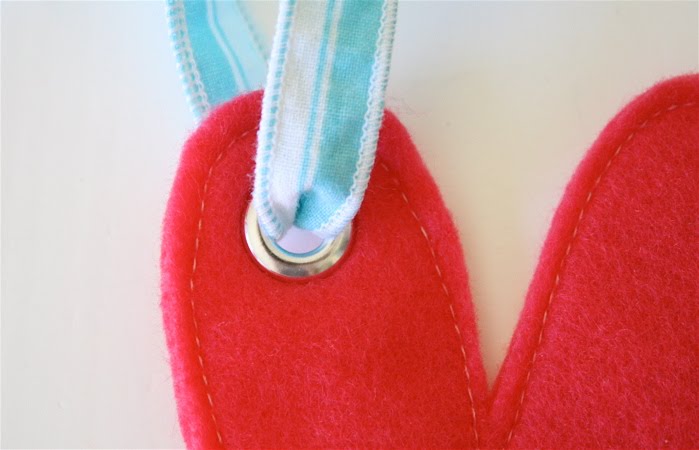 And hang them up!
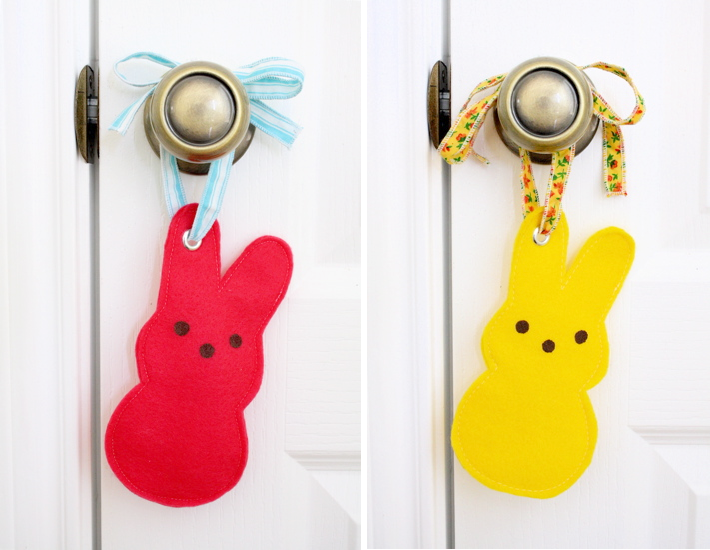 Happy Easter!
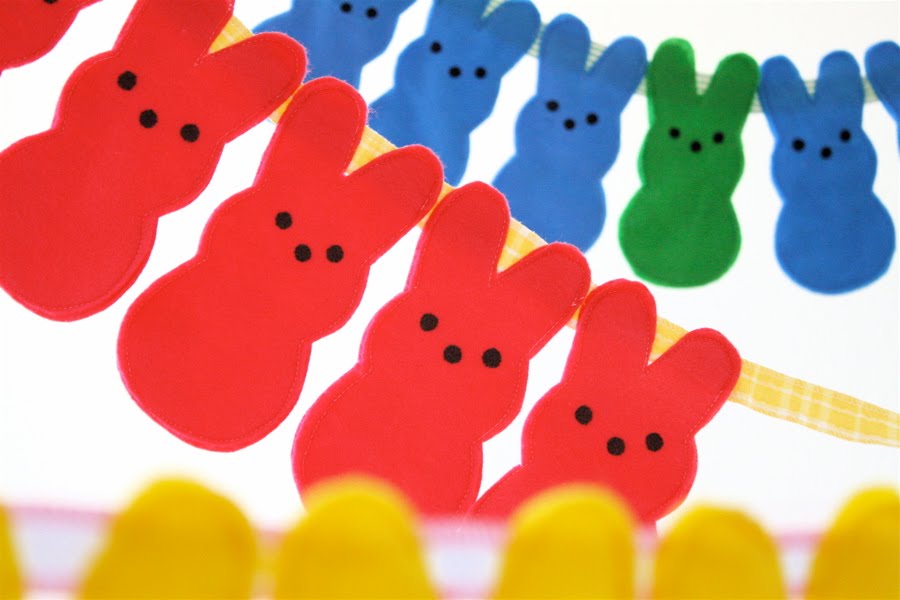
Sunday, March 27, 2011
Progress so far!
I am actively working on this Easter swag. I measured the windows at work and I will be making these things forever if I make enough to swag each window. Oh, well. It will look pretty when I am done.
Here's pics of my current activity on this project:
 Notice that I still have not gotten to the Easter Eggs themselves. I really like the way these are going to turn out. I think each window will have 2 baby chicks, 2 rabbits, and an Easter Egg. So, I need to be cutting more out if I plan to cover 20 windows!!!

Here's pics of my current activity on this project:

Wednesday, March 23, 2011
I've started working on my Easter swag
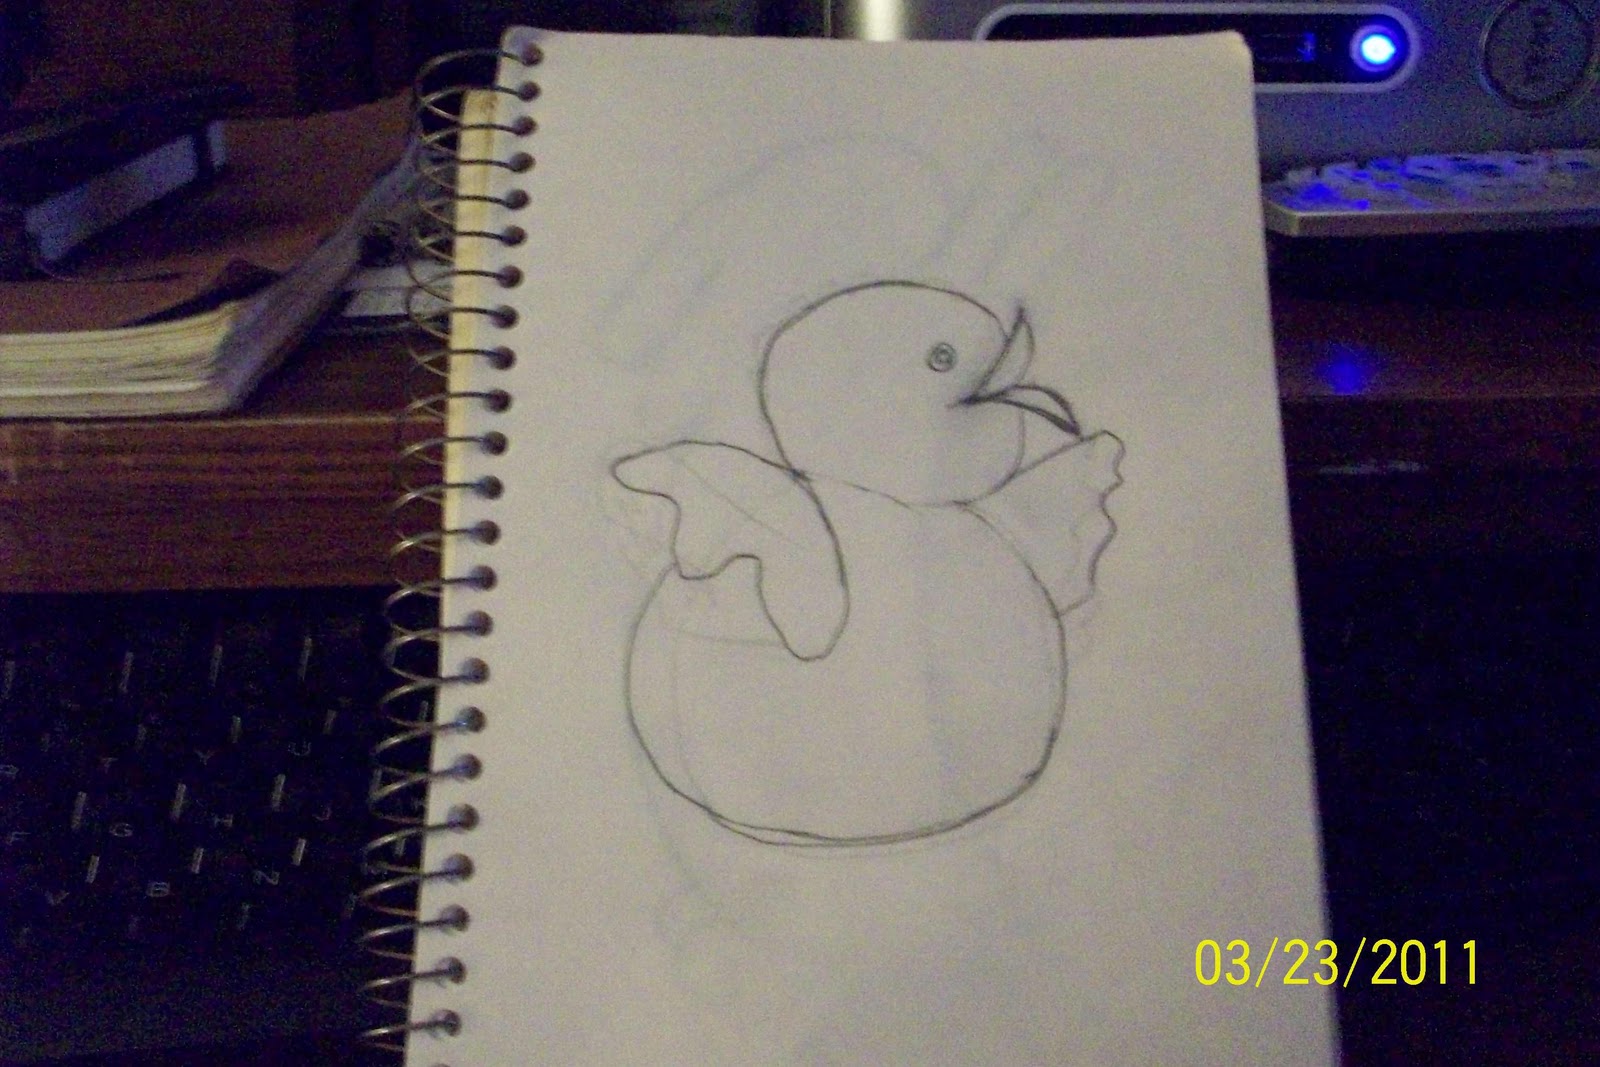
Since I need to get started on my Easter swag because time is short and I need quite a length of final swag, I decided to get right on it.


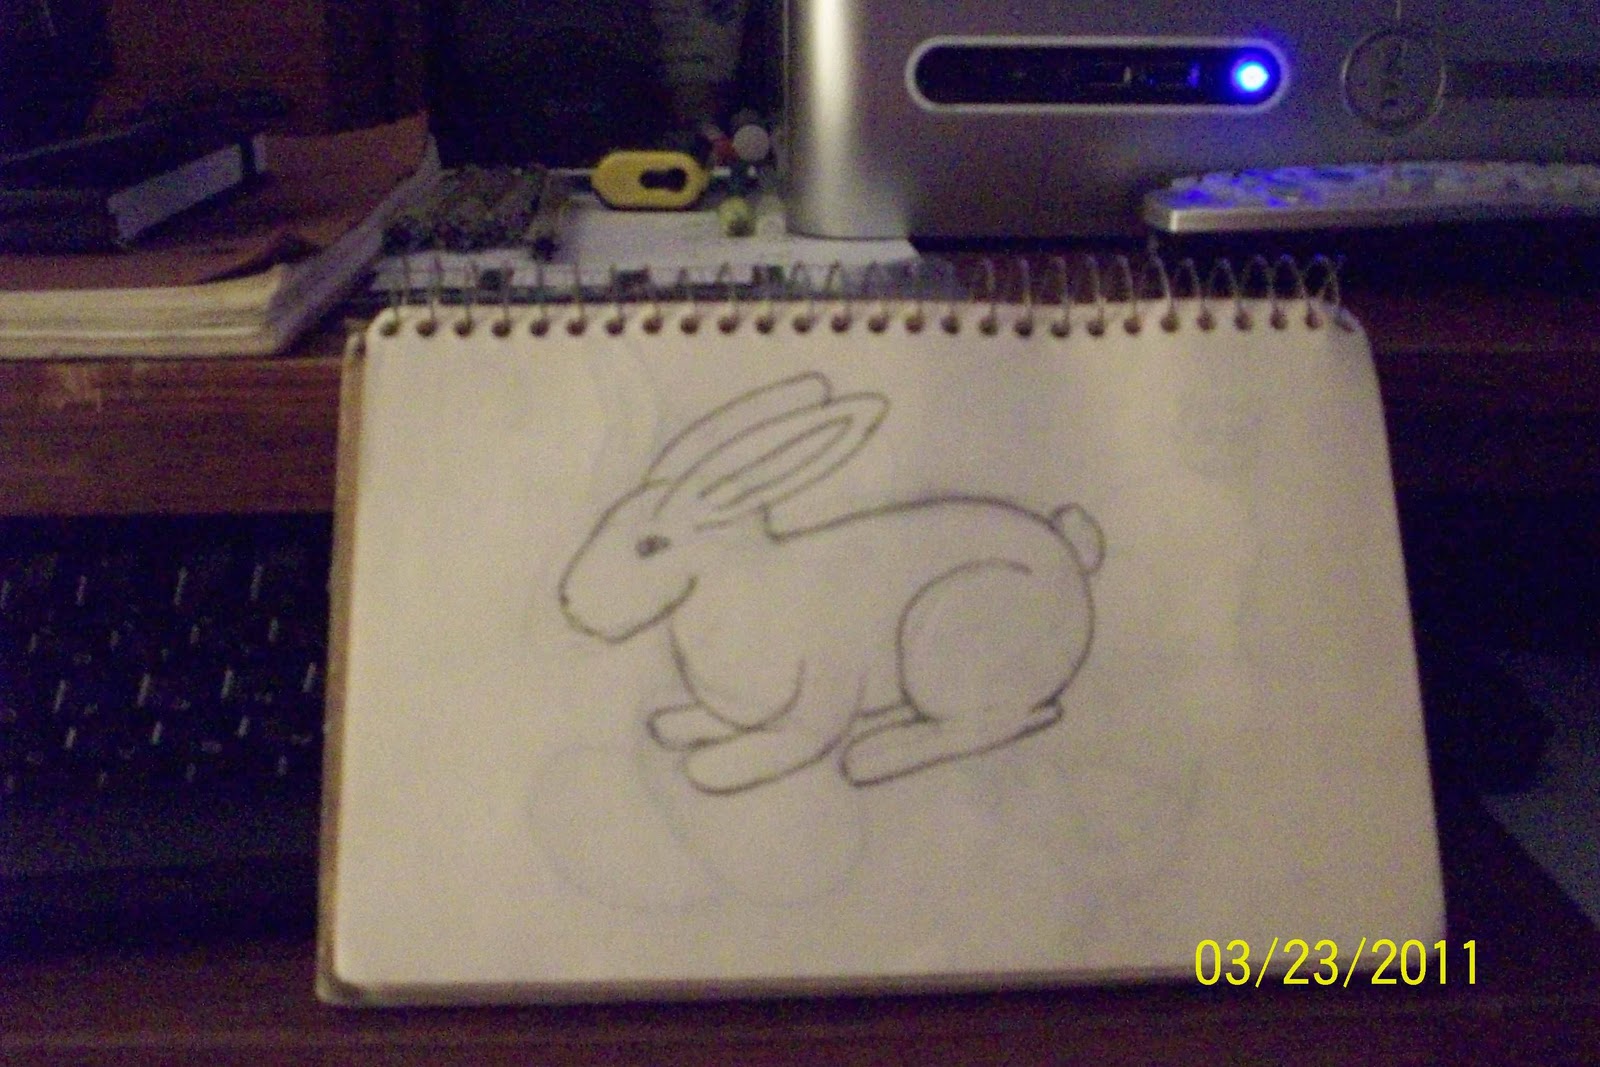
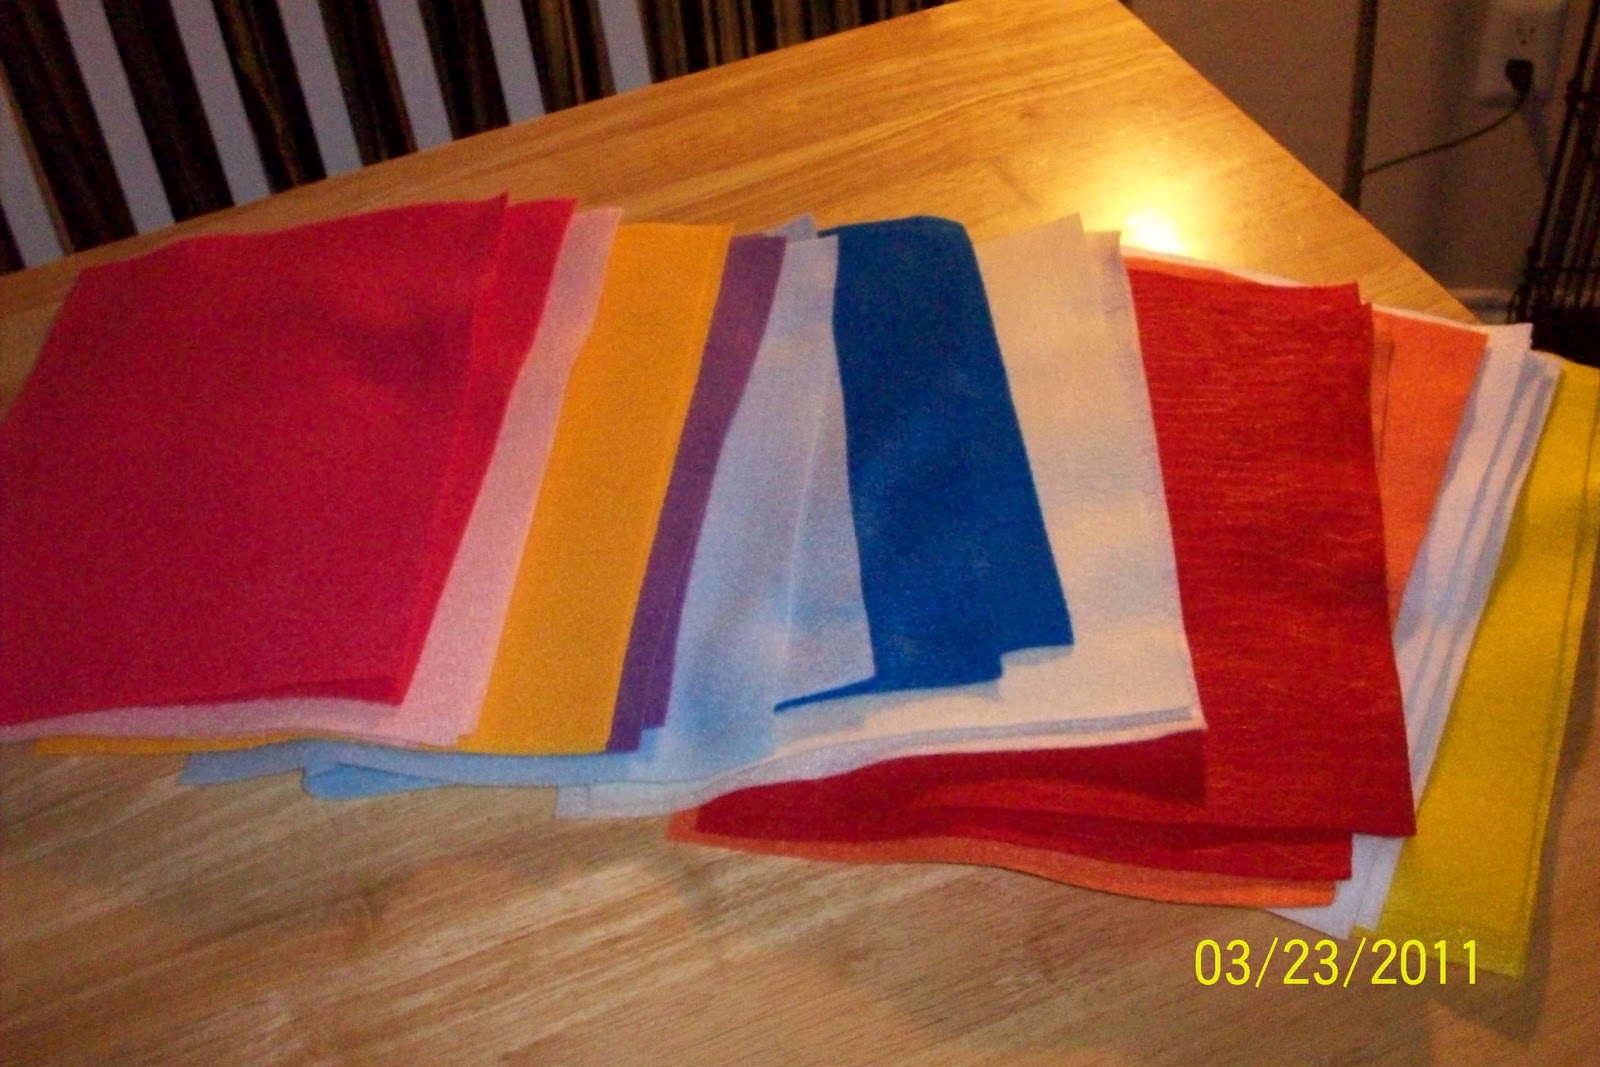
 Here are some of the sketches I made for the individual figures of the swag. As I said before, I want to have bunnies, chicks, and easter eggs all sewn together in pastel colors.
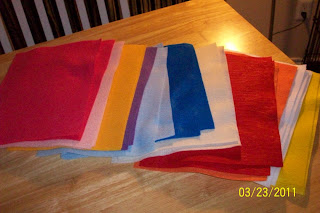
With that in mind, I went to JoAnn's and brought back some pastel and bright felt squares to use to make my figures.
 I
I


With that in mind, I went to JoAnn's and brought back some pastel and bright felt squares to use to make my figures.
Subscribe to:
Posts (Atom)
Why Are Orcas Attacking Boats?
Recently I have been reading articles and news about Orcas attacking boats and causing quite a bit of anxiety. Since these whales hunt in p...

-
Here's a tutorial on how to make paper beads. I think we all may have made these before as children, but they are still fun to make and...
-
 Here is the tutorial on making paper mache birds. I cannot wait to try these. I simply love birds and I don't know why. These look li...
 -
 Here is an artist I found that I simply love. Her work is fresh, funky, and funny. All things that make for great art in my mind. Please ...


