Friday, August 13, 2010

What I've been up to...

Aside from working at my day job for many extra shifts and going in for numerous committee meetings on my days off, I'm having a massive block and not wanting to do much of anything artistic.   I have been looking at some of these crafts I am posting for inspiration.  So, I have started with making paper beads.  I am practicing making them and I find that not only are they easy to make, the making is rather soothing and your mind can do other things while your hands roll the bead.  I really like that.

 I also have been experimenting with making some type of paper Christmas tree to use to decorate the unit I work on.  I am a psychiatric nurse, so my options are really limited due to the prohibition for most items used to decorate for Christmas.  I have been using paper and have made a so-so effort.  I think it will look cute with a Star on the top!

I need to make another and this time be a little more exact in the cutting of the paper strips so my tree will sit up straight.  I think, though, that this type of tree will work and I can spray paint it or spray flocking, or just cover it with glitter and it will look festive sitting on the patient's tables on the unit.

I also have been feeling the need to finish my faces painting, but by using multimedia.  I'll let you know how that turns out.

So, I have been busy, just not making much.  Hope you have been more productive than I have been.

Wednesday, August 11, 2010

Window Shopping Wednesday -- Christopher Maloney

All I can say about this man's work is "Oh, my!" 
I hope you feel the same way after seeing some of his work here.
Please go to his website and look at all of his work if you can, it is worth it.
_____________________________________________________________________________________


Tuesday, August 10, 2010

Tuesday Tutorial -- Recycle with flair: Turn your newspaper into a stylish vase

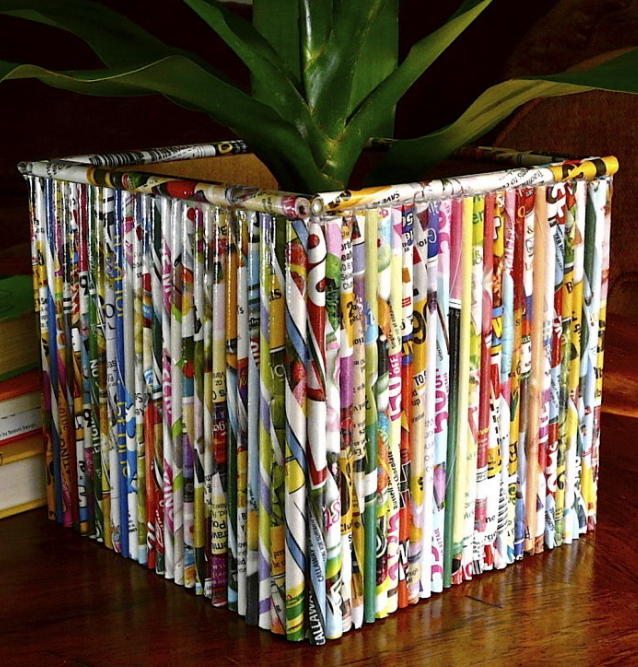
Here's a wonderful use for what would usually end up in your trash.  I love finding alternative ways to use newspapers, so this is just the ticket.  I hope you like it and I hope you try this for yourself.  It certainly gives a really pretty outcome from such a lowly start, don't you think?
_____________________________________________________________________________________

Rescue some of last week's copies of The Oregonian from your recycling bin and transform them into a beautiful piece of home decor. All you need are a few simple materials and a little time.


MATERIALS
 Assorted newspaper pages, color or black-and-white
Two bamboo skewers
Glue stick
Small cardboard box
Glass vase that fits inside the box
Tacky craft glue
Sharp, strong scissors
Clear polyurethane spray sealer, gloss finish

DIRECTIONS
Make newspaper reeds
1.
Tear or cut each newspaper or ad circular page along its folds (both the spine and where the paper folds in half). You should end up with pieces that are roughly 10 to 11 inches square; they can be a little larger or smaller than that, and a rectangular shape works as well as the square.
2. Place one piece of newspaper on your work surface. The side of the page you want to show on the finished reed should be facing down. Place a bamboo skewer on the bottom right corner of the paper at about a 45-degree angle.
3. Beginning at the corner, roll the paper snugly around the skewer. As you roll, gently pull the end of the skewer out of the reed a little, so it doesn't get lost inside as you're rolling it. (If your skewer does disappear inside the reed, not to worry -- use the second skewer to poke it out.)
4. When you've rolled about half of the sheet around the skewer, stop for a moment and apply glue stick along the two edges of the paper that are still showing. Then, continue rolling the rest of the paper. Make sure the last corner of the paper is securely glued down. Remove the skewer.
5. Repeat this process to make enough reeds to cover your box.

Make the vase
1.
Cut away the top and bottom flaps of the box, so it's open on the top and bottom. You'll be covering the outside of the box with reeds.
2. Place the box on some newspaper to protect your work surface. Apply a generous amount of tacky craft glue along one corner of the box.
3. Take one reed and cut it straight across, about 2 inches from one end, with scissors. Gently press the reed into the glue, placing the cut end at the bottom edge of the box, flush with your work surface. The rest of the reed will extend above the top edge of the box; you'll cut it later.
4. Apply more glue to the box and repeat Step 3 until one side of the box is covered with reeds. Let the glue dry about 30 minutes.
5. Once the glue is dry, use a pair of sharp scissors to trim away the ends of the reeds so they're flush with the top edge of the box.
6. Repeat Steps 3 to 5 to cover the other three sides of the box.
7. Cut eight reeds to match the width of the box. Glue these along the top edge of the vase, two per side. You may need to trim them a little to fit. Let the glue dry.
8. Apply two to three coats of clear polyurethane sealer to the inside and outside of the finished vase, letting the varnish dry thoroughly between coats.
9. Slip a glass vase into the cardboard one and fill it with flowers.

Note:
You can use newsprint pages or glossy ad circulars for this project, or a mixture of both. (I used ad circulars.) The number of reeds you'll need for your vase will be determined by the size of the box you use. The 6-by-6-by-6-inch box pictured here required about 120 reeds.

-- Portland freelance crafter and writer Diane Gilleland

You can visit her blog at Craftypod.com.

Thursday, August 5, 2010

Thursday -- Spa Day

 This sounds like a wonderful way to help your skin while soothing your mind and relaxing your body.  I cannot wait to try this.  Let me know if you try it, too.  I just hope I don't eat it first!

This is from The Green Beagle and there are many other options available there, too.
__________________________________________________________________________________

Organic Honey, Yogurt, Walnut Mask

July 26, 2010 by The Green Beagle  
Filed under Health and Beauty


You may not always have the time to go to the spa or the money. Why not make your own spa treatments at home? You can invite some friends over and have a spa party or make your own recipes in your spare time. It’s a fun way to learn about the healing and nutritional properties of the foods you love.
Organic Yogurt Walnut Scrub
This treatment works best on normal or combination skin. The nuts exfoliate old dry skin while the yogurt soothes, and the honey promotes calmness.
Ingredients:
1/4 cup organic plain yogurt, chilled
1/4 cup organic walnuts; ground or pulverized
1 tbs Organic Fair Trade Raw Honey
Instructions:
Stir ingredients together. Apply to freshly cleaned face and gently massage to exfoliate. Let the mask sit on your face between 5-10 minutes, then wash off with warm water and pat dry.
Enhanced by Zemanta

Tuesday, August 3, 2010

Tuesday Tutorial -- DIY Tissue Garland

This is a simple but beautiful craft to spice up any activity or to just make a porch or deck look festive.  This will be useful for those last of the summer garden parties and these are so easy to make.  Let me know if you make these and how it worked out please.  I plan to make this garland and use it to decorate the psychiatric unit where I work to make it feel more festive.  I'll let you know if it works out or not.

You can visit the original blog to find this and other really fun things to make and do.


____________________________________________________________________________________


Y'all, this might be the best... fastest, cheapest, eye-pleasing-est party decorating trick ever. You can literally make this Tissue Garland that I made for Clare's Buggie Birthday an hour before your party starts when, eh-hem, you should be showering.

Click here to get the so easy DIY for Tissue Garland.

DIY Tissue Garland

These directions are for the flower garland that I made but you could easily make squares, circles or pennants... any shape really! Ooooh snowflakes!

1. Grab a few sheets of tissue in party coordinating colors.  I used about 6 sheets to create 4 - 6' strands


2. Fold a few sheets up until the short width is the width of your large flower (mine were about 5") and then cut off the extra. Cut through the folds on all sides so you have a stack of squares.


3. The extra becomes your smaller flower. Cut it square. Cut through the folds on all sides so you have a stack of squares.


4. Take a few squares (depending on scissor performance) and fold them in half. Then fold them in thirds to a point on the folded side (like a sliced pie)

mmmm pie.

5. Cutting through all layers at once, cut the top into the rounded curve of one petal.


6. Unfold and you have a flower (hopefully.)


7. Repeat with the rest of your tissue squares.

8. Arrange your stacks of flowers by color and size next to your sewing machine.

9.And start sewing! Just place one flower into your machine and start and as that flower finishes slip another flower in. You can leave a bit of space between or overlap the flowers. I will overlapped even more next time. Perhaps even sew through multiple layers at the same time and fold them to create 3-D flowers.


Note: My machine did best on a standard stitch length (2.5), when I tried a (5) it started to bunch. If you are having trouble with bunching, you can pull the tissue from the back of your machine (gently) and it should stay smooth.

The strands are so light that you can easily hang with tape. They look great on windows!

This was so fast and easy and it added alot to the party!

Enhanced by Zemanta

Thursday, July 22, 2010

Thursday -- Spa Day

Here's a wonderful recipe for a hand scrub that we all can use.  This would be a great gift as she explains in her tutorial, or just to keep on hand for yourself to keep your hands soft and supple.  Either way, I hope you enjoy!  This is from  Under the Table and Dreaming by Stephanie Lynn.  Check out her blog for more wonderful creations.  You can follow her on Face Book, too.

---------------------------------------------------------------------------------------------

Lemon Sugar Hand Scrub 
We all have them {well at least I do}; poor, exhausted, DIY doing, spray painting extraordinaire, crafters hands. I have been using this simple mix for a few years and it is the best recipe to rejuvenate your skin and bring your fingertips back to life. The sugar is an excellent exfoliate to remove the craft leftovers from your nail beds and cuticles too! It takes only minutes to mix and you most likely have all the necessary ingredients sitting right in your pantry.
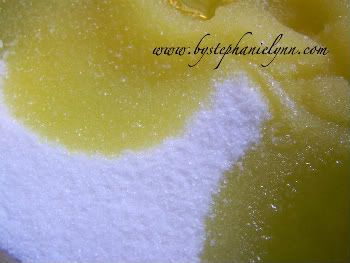
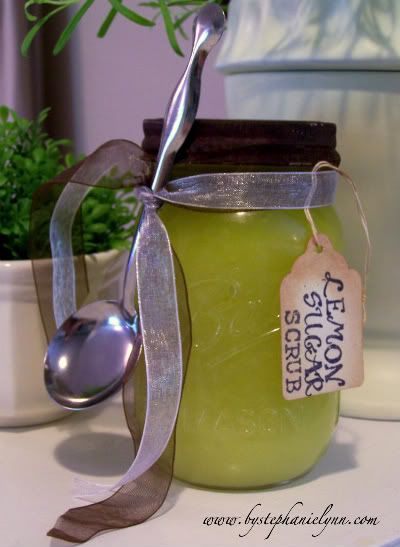
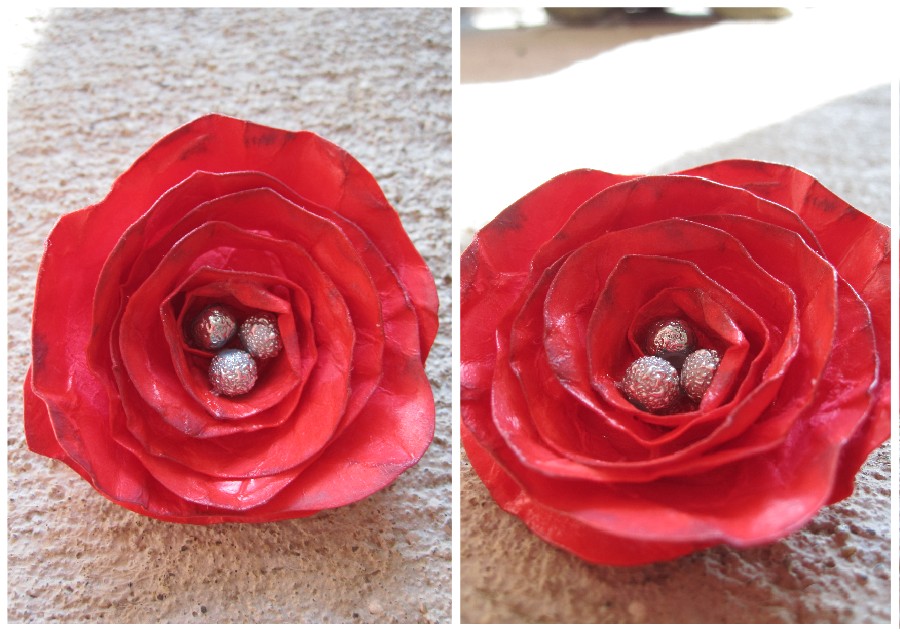
Packaged up just right this makes another inexpensive Mother's Day gift; a perfect addition to tuck in a little gift basket.

Begin my mixing 2 1/2 Cups of Sugar with 1 Cup of Extra Virgin Olive Oil. Add in 4 Tablespoons of Lemon Juice {or scented essential oils to your liking}. This mixture will make enough to fill a 12oz. Mason Jar {and you'll have just enough left over to clean your hands afterwards too}

Mix really well until a gritty paste forms and spoon into a glass container. {make sure your container has a lid that seals}

I have to say I love this mix and use it all the time. After sitting for awhile you may need to mix prior to using as the sugar may settle. A tiny bit is all you need and it leaves your skin extra soft and smooth. {plus not to mention it scrubs away all craft evidence so my hands do not look like a mechanics out in public}Enjoy!

Tuesday, July 20, 2010

Tuesday Tutorial -- "Ceramic" Paper Roses

Here's a great tutorial I found on The Scrap Shoppe blog.  I posted it here but I suggest that you click on over to see what else can be found at either The Scrap Shoppe blog or at the Singing Three Little Birds blog.
There are several other tutorials there that you might enjoy.  I hope you like this one, because I think these roses are "the bomb"!

--------------------------------------------------------------------------------------------------------

"Ceramic" Paper Roses
If you missed my guest post during Flower Week at Singing Three Little Birds, here's the lowdown!


These rolled roses originally started out as plain red cardstock. Now they have an almost ceramic look to them. Let me show you how I made them!


 1. Start with a couple of pieces of cardstock (I only ended up needing one for all of these flowers, but I grabbed a 2nd piece just to be sure).


2. Soak the cardstock, one sheet at a time, under running water. Be sure and wet both sides of the cardstock.
 
3. Wad each piece of cardstock up into a ball. You're going to want it very rumpled so you will need to wad it up, open it, and wad it up again several times. Just be careful that you don't rip the paper.
 
4. Lay the cardstock out flat and allow it to dry. I soaked mine before going to bed and let it dry on the kitchen counter overnight. If you're slightly more impatient you can take a hairdryer to it.
 
From here I tried two different techniques to get the "ceramic" look for the roses. Here is the technique for the single rose.


5. From a roughly 5"x5" square of the dried cardstock, cut out a circle. From the circle cut out a spiral. I like to cut my spirals in a wavy fashion to give the final rose a more realistic look.


6. Start with the outermost part of the spiral and start rolling it between your fingers. Contine you to roll until you get to the center of the spiral.


7. Take the center of the spiral and use some adhesive to glue the base to the rest of the rose so it acts as the base of your flower.


8. A pretty little rose!


9. Ink the edges of the rose with a contrasting color. This just makes the rose more realistic so its not uniform in color. You can skip this step if you would rather.


10. Apply a somewhat thick coat of Mod Podge to the rose with a sponge brush. Not too thick though! If its too thick the glue with dry white instead of clear (especially between the petals).


11. Turn the rose over after the front dries and appy more Mod Podge to the back of the rose.


12. Apply a pin, bobby pin, clip, or whatever you like to the back of the rose.


Note: This starts the 2nd "ceramic" technique. (I think I actually like this one better.)


13. Cut three different size squares from the wrinkled cardstock. Apply Mod Podge to each square. Once the front dries, flip it over and apply again to the back.


14. Cut out spirals as before.


15. Once again, start with the outside of the spiral and start rolling the rose.


16. The roses for this set of 3 flowers are more tightly rolled so they can be placed snugly next to one another.


17. Glue the back of the roses as before.


18. Ink the roses at this step if you are so inclined.


19. Apply another coat of Mod Podge just to get the flowers nice and shiny!


20. Line the 3 flowers up in a row and adhere a strip of the red cardstock to the back of the flowers. Apply a small amount of adhesive between each flower to glue them to each other also just to be sure there is no flopping around. Add a pin, bobby pin, or whatever suits your fancy.


The final single rose. I glued some large silver beads to the center.


The final set of 3 roses. I didn't add anything to the center of them since they are wrapped so tightly. And I think they look just as good without the extra embellishment.


Its may be difficult to tell from the photos, but these roses have a great shine to them. And the Mod Podge also makes them very stiff so they also almost feel like they could be ceramic. The wrinkled paper and the waviness of the spiral really give them a realistic look!


So, what to do with these fun new flowers?


Well, since they are pinbacks I can add them to any outfit as a brooch, put them on a belt, add them to a headband...


Or thread them through the chain of my DIY go-to necklace! I'm loving this look!


Other than the time it took the cardstock and Mod Podge to dry (which was really only a few minutes), this was a pretty quick project.


Enhanced by Zemanta

Why Are Orcas Attacking Boats?

Recently I have been reading articles and news about Orcas attacking boats and causing quite a bit of anxiety.  Since these whales hunt in p...