Showing posts with label crafting. Show all posts

Thursday, February 23, 2023

Are you new to crafting? Don't know what to do or how to do it??

Today I want to talk about crafting.  I have always done crafts from as far back as I can remember.  It helps that my mother encouraged me and bought me any supplies that I needed, but usually I was more a "trash to treasure" type of crafter as a child. I never really thought about the fact that some people have never in their life made something from nothing and don't know the satisfaction that brings.  So here is a post that addresses how to get started on that first project without breaking the bank.

Why craft?


Crafting is a fun and creative way to express yourself and create unique items for yourself or as gifts for your loved ones. However, it's easy to get intimidated by the cost of crafting materials, especially if you're just starting out.  That said, crafting brings you such a sense of accomplishment when you see that you created something that never existed before.  It builds your self-esteem and improves your mood.  Making something requires concentration, some dexterity, and the ability to follow instructions.  Once you have a few projects under your belt, you will start to see possibilities all around you that are speaking just to you!

How do you start crafting?

1. Start with simple projects

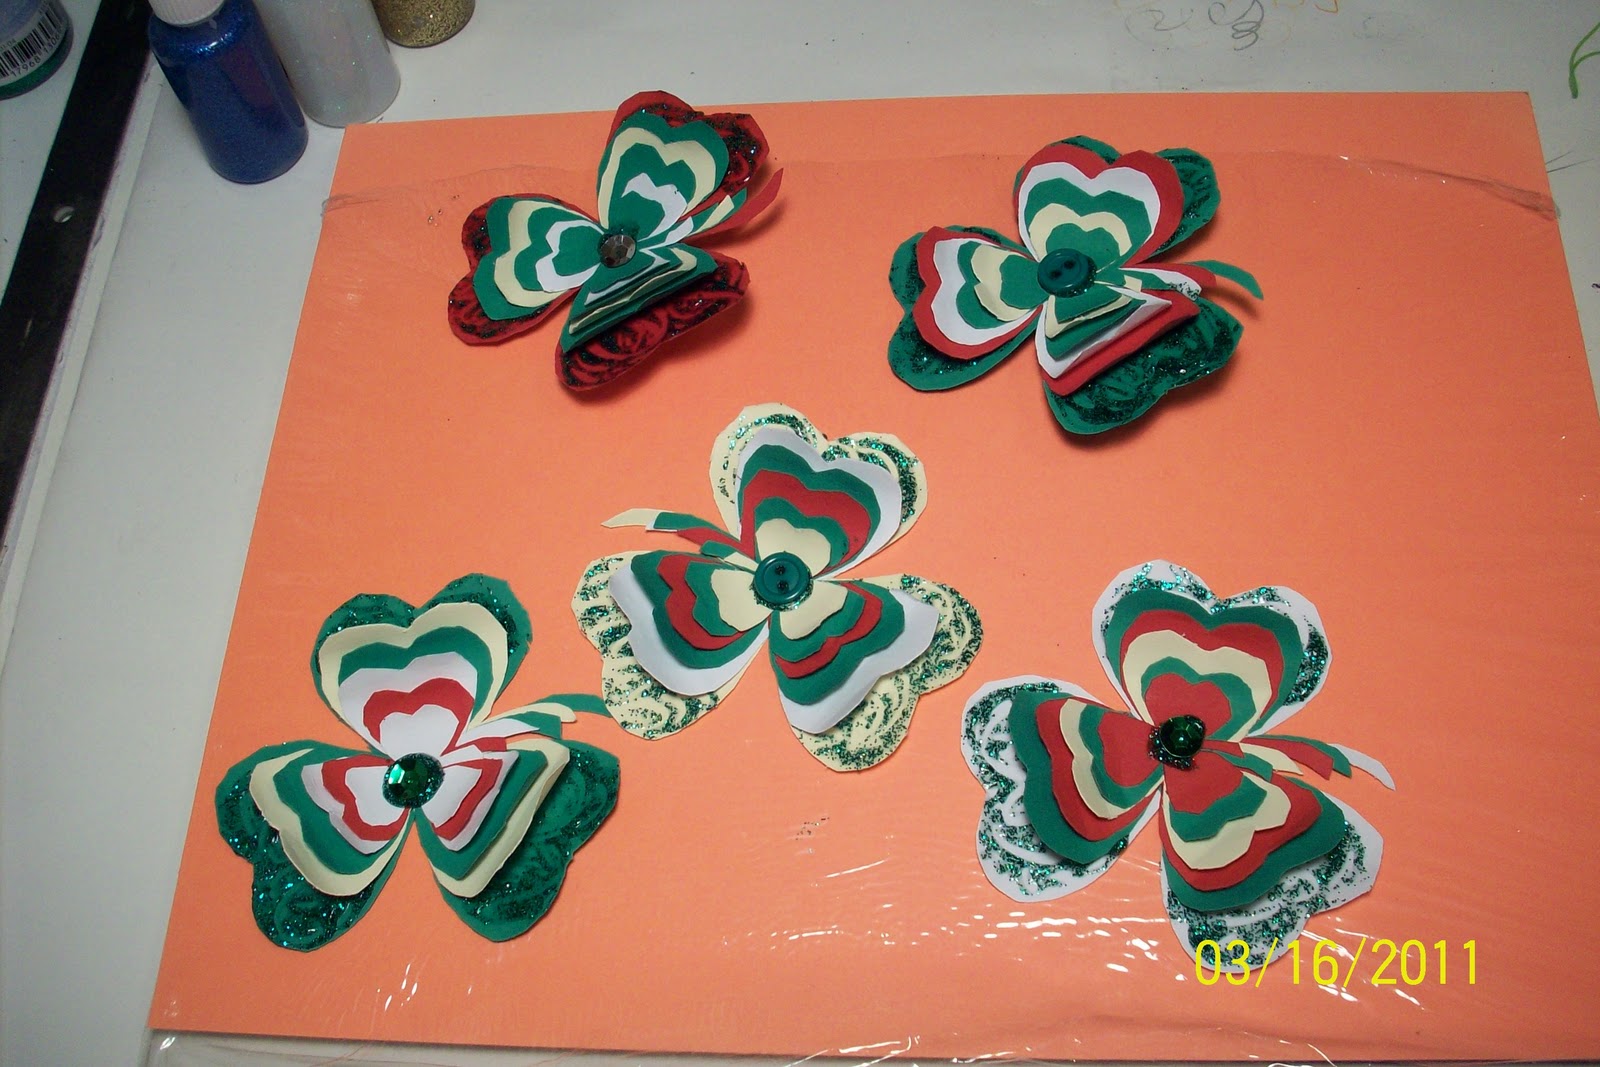
One of the best ways to start crafting without spending a lot of money is to begin with simple projects that require only a few materials. For example, you could start with a basic knitting or crocheting project that only requires a single skein of yarn. Alternatively, you could try making paper crafts using just scissors, glue, and paper. Starting with simple projects not only helps you save money but also allows you to build your skills gradually.

2. Look for free tutorials online

There are many websites and YouTube channels that offer free crafting tutorials. You can find tutorials for everything from knitting and crocheting to woodworking and jewelry making. By following these tutorials, you can learn new skills and techniques without having to pay for a class or workshop. Watching and following video tutorials also helps you understand the process from beginning to end so you start out knowing exactly what you will end up with.  It's uncomfortable to be making something that you don't really know how it is going to look like when you are done--kinda makes you nervous and hesitant, which then shows up in the finished project.

3. Use what you already have

Before you go out and buy new materials, take a look around your home to see what you already have. You will be surprised at all the materials you have in your home that are perfect for crafting.  Got boxes?  Cardboard is a wonderful material to use.  There are artists that use nothing but cardboard for their work! Got old magazines? Magazine paper is thick and colorful, so it is perfect for use in some craft projects.  Have you ever seen a portrait made out of little pieces of magazine papers?  They are beautiful!  Do you have empty toilet paper and paper towel rolls? There is a plethora of crafts that can be done with these little jewels. 

4. Shop at thrift stores and garage sales

Thrift stores and garage sales are great places to find crafting materials at a fraction of the cost of new materials. Look for yarn, fabric, buttons, and other crafting supplies. You can also find inexpensive tools and equipment, such as knitting needles and crochet hooks. Don't forget to look through the clothing at garage sales.  Deconstructing clothing can provide you with a mass of things to use when crafting. Don't be afraid to haggle at garage sales; you may be able to get an even better deal.

5. Join a crafting group

Joining a crafting group is a great way to meet other crafters and share materials and ideas. Many crafting groups have "stash swaps" where members can trade materials they no longer need. You may also be able to borrow tools and equipment from other members. Check with your local library, community center, or craft store to find a group near you. You can also find these groups in online forums, crafting sites, and even on social media.  You can get support while socializing.  Crafting has always been a social activity--think quilting bees.

Now that you have all this information, I want to leave you with a few websites I found that might get you started.  The hardest part is deciding what you want to do, so trolling the internet is always a good starting place, so here goes:

https://abeautifulmess.com/daisy-statement-necklace/

http://hocuskocis.blogspot.com/2012/07/diy-shrinky-dink-necklace.html

https://www.apieceofrainbow.com/how-to-make-wreath/

In conclusion, crafting doesn't have to be expensive. By starting with simple projects, using free tutorials, using what you already have, shopping at thrift stores and garage sales, and joining a crafting group, you can save money and still enjoy the many benefits of crafting. So get going and start your project.

I am off to make paper jewelry later today.  I found an artist whose earrings are so beautiful and they are made only of layered paper and paint.  Can't wait to get started!


tags: craft, crafting, crafting with paper, crafting with what you have, crafting tutorials, crafting groups, making crafts from nothing, starting crafting

Wednesday, March 16, 2011

Crafting for St. Patrick's Day

As usual, I'm a day late and a dollar short!  Well, I did finally get started on those St. Patrick's Day crafts that I posted the tutorials on.  I had to work quickly, since tomorrow is the day.  However, I had lots of fun making the pins and will continue to explore this concept for other holidays. 

As you can see from the pictures, I am still working on the Shamrock swag.  I hope to sew the shamrocks all together tonight, but if not then I will have to do it EARLY in the morning so I can take it to my work and hang it in the window on my unit.  I love it when my unit is festive and happy, so if this is what it takes, then I'm in for it!

Below you can see my progress.  Let me know what you think.

 Here's the shamrock pins ready to wear on my lapel tomorrow.  I know I will have my GREEN on, will you?

These are the shamrocks for the swag all ready to be sewn together and hung up to announce the holiday!
Enhanced by Zemanta

Tuesday, August 17, 2010

Tuesday Tutorial -- brenna’s paper capiz shell chandelier

This is in the catagory of "Oh my God!"  This is just too beautiful to believe.  I hope someone has a place they can hang such a beautiful chandelier and they make this because I am dying to know if it turns out just as beautiful as this picture.  Maybe when I move to a new house, I will get to try this.  I certainly hope so.

This is from Design Sponge and there are many other wonderful DIY items also.
____________________________________________________________________________________

i love wax paper for packing lunches; i wrap sandwiches in a piece of wax paper and tie it like a present with a little cotton string. it’s so much better looking than a
plastic bag. wax paper comes in handy for more things than i realized, like rolling it up to use for a funnel, or how about rubbing a piece of wax paper on the top of your
shower curtain rod to cut down on that terrible screeching in the morning…problem solved. but who knew that if you iron layers of wax paper together it looks remarkably similar to a capiz shell? this discovery brought me to today’s project: the faux capiz chandelier. hung over your dining table, or outside at an outdoor dinner party, it is an easy solution to a dramatic light fixture and will look phenomenal in either setting. i hope you enjoy making your own as much i did! -brenna


Materials:
- hanging planter basket
- white spray paint
- ribbon
- scissors
- 1-2 rolls wax paper
- 2 big pieces of parchment paper
-  iron
- hot glue gun & glue sticks
- circle cutter (i didn’t have any luck with a “punch”)
- cutting mat
Instructions:
1.  spray paint your planter basket. let dry.

2.  start making the capiz shells. lay out the two pieces of parchment paper on your ironing board or on a clean dish towel on the floor or table. (if you use your floor or
table, just make sure it wont be damaged by the heat of the iron)
3.  cut three pieces of wax paper about the same length. mine were about 18”. sandwich the three pieces of wax paper between the parchment paper. the parchment paper allows the wax to stay within the layers of paper, helps it stick together, and gives the wax paper a smooth finished surface.
4.  iron the paper sandwich on a low setting. remove the layered wax paper from between the parchment, and repeat.
5.  set the circle cutter to cut 2 ½ inch circles. with the circle cutter, cut circles from the layered wax paper on your cutting mat. it helps to tape the wax paper down to
the mat.

6.  cut ribbon pieces and attach the ribbon to the planter basket. the length of the ribbon will depend on the method of attachment to the basket… (single or double strand). my lengths were between 7 (single) and 16 inches (doubled). you can attach them to the basket either by hot gluing the end of a single strand to the basket wire, or by folding the ribbon in half, and creating a knot over the wire. start at the bottom, and work your way up.

7.  once you finish one tier of ribbon, attach the capiz shells to the ribbon with a tiny dot of hot glue near the top of each shell. i alternated two and three shells on each ribbon and only attached shells to every other ribbon. overlap the shells by about ¼”. finish an entire lower tier, then move on to the next higher tier.

8.  once you cover the hanging basket you are done! you can attach a simple bulb of you want this to be a source of light. hang in your desired location, stand back and
admire.


CLICK HERE for the full how-to after the jump!


Materials:
- hanging planter basket
- white spray paint
- ribbon
- scissors
- 1-2 rolls wax paper
- 2 big pieces of parchment paper
-  iron
- hot glue gun & glue sticks
- circle cutter (i didn’t have any luck with a “punch”)
- cutting mat
Instructions:
1.  spray paint your planter basket. let dry.

2.  start making the capiz shells. lay out the two pieces of parchment paper on your ironing board or on a clean dish towel on the floor or table. (if you use your floor or
table, just make sure it wont be damaged by the heat of the iron)
3.  cut three pieces of wax paper about the same length. mine were about 18”. sandwich the three pieces of wax paper between the parchment paper. the parchment paper allows the wax to stay within the layers of paper, helps it stick together, and gives the wax paper a smooth finished surface.
4.  iron the paper sandwich on a low setting. remove the layered wax paper from between the parchment, and repeat.
5.  set the circle cutter to cut 2 ½ inch circles. with the circle cutter, cut circles from the layered wax paper on your cutting mat. it helps to tape the wax paper down to
the mat.

6.  cut ribbon pieces and attach the ribbon to the planter basket. the length of the ribbon will depend on the method of attachment to the basket… (single or double strand). my lengths were between 7 (single) and 16 inches (doubled). you can attach them to the basket either by hot gluing the end of a single strand to the basket wire, or by folding the ribbon in half, and creating a knot over the wire. start at the bottom, and work your way up.

7.  once you finish one tier of ribbon, attach the capiz shells to the ribbon with a tiny dot of hot glue near the top of each shell. i alternated two and three shells on each ribbon and only attached shells to every other ribbon. overlap the shells by about ¼”. finish an entire lower tier, then move on to the next higher tier.

8.  once you cover the hanging basket you are done! you can attach a simple bulb of you want this to be a source of light. hang in your desired location, stand back and
admire.

Blog Widget by LinkWithin
Enhanced by Zemanta

Monday, January 11, 2010

Top 100 Tutorials of 2009

 I've been under the weather for about a week now, so I haven't got much to say unless you want to talk about sleeping.  Since I don't have anything new to show you, I found this wonderful list of craft tutorials for you to try out.  I plan to try the clothespin dolls soon!
 
________________________________________________________________________________
 
2009-tutorials
It was a good year in the online crafting world. Here’s a list of 100 craft and sewing tutorials of 2009, not ranked in a particular order. I made a similar list last year that continues to be popular. This year I decided to include my own tutorials! Feel free to comment and link to your favorites, as I’m sure that I’ve left many off the list. It’s amazing how much creativity is out there. So go make something in 2010. Happy New Year! Those marked with an asterisk are pictured above.

BAGS, POUCHES & PURSES

Buttercup Bag from Made by Rae.*
Phoebe Bag from Artsy Crafty Babe.
Diana Hobo from Think Liz.
Ruffled Messenger Bag from Between the Lines.
Basic Messenger Bag from Mmmcrafts.
Lunch Bag from Amy Karol for Etsy’s How-Tuesday.
Kate’s Notebook Lunchbag from Design Sponge.
Reusable Snack Bag from We Wilsons.
Apple Backpack from Alpha Mom.
Perfect Box Pouch from Indie House.
Zakka-inspired Pencil Pouch from Noodle Head.
Zippered Pouch with Reverse Appliqué from Orange Flower.*
Fuzzy Felty Flex Frame Purses from Nicole Mallalieu Design.
Wild Things Tote from Courtney Russel for Bloesem Kids.*
Fat Quarter Tote Bag from Cicada Daydream.
Drawstring Gift Bag from A Little Red Ribbon.
Shoe Bag from Betz White.
The Everything Pocket Bag from Chickpea Sewing Studio.
Earth Day Spa Set from Stardust Shoes for Michael Miller Fabrics.
Little House Pouch from The Long Thread.*
Boat Tote from The Long Thread.
Water Bottle Tote from The Long Thread.

CLOTHING & ACCESSORIES

Glasses Case from Design Sponge by Kata Golda from her book Hand-Stitched Felt.
Rose Petal Tee from Appliqué Your Way by Kayte Terry for Etsy’s How-Tuesday.
Spring Ruffle Top from Made by Rae for Sew, Mama, Sew.
Ruffled Scarf from Craft.
Merfish Necklace from Resurrection Fern.
Tool Apron, excerpted from Lexie Barnes’ new book Sew What! Bags for Etsy’s How-Tuesday.
10-Minute Pillowcase Apron from from Betz White.

TOYS & SOFTIES

Kokeshi Stuffie from Melly & Me.
Fabric Checkerboard from Rashida Coleman-Hale for Sew News.
Mouse Softies “Jofus and Lally” from RicRac.
Warm Fuzzy Mammal Finger Puppets from Soto Softies.
Clothespin Doll Tutorial from Going Sew Crazy.*
Boo-boo Buddy from Simple Up.
Tooth Pillow from Mmmcrafts.
Love Bird from Molly Chicken.
Bunny Bowling from The Long Thread for Etsy’s How-Tuesday.
Little Red Riding Hood from The Long Thread.
One-Hour Softie from Ric-Rac.
How to Make a Socktopus from CraftStylish.
Felt Food by Dana of Made for So You Think You’re Crafty.
Alphabet Block Magnets from Plum Pudding.

CHILDREN’S CLOTHING & ACCESSORIES

Smocked Sundress from Heather Ross of Weekend Sewing for STC Craft.
Clothespin Hairclip Holder from Nested.
Corduroy Flower Skirt from Tea Rose Home.
Pocket Bib and Burp Cloth from Prudent Baby.
No Sew Scrap Scarf Tutorial from Grosgrain.
Owl Costume from Alpha Mom.
Flower Hair Clip Tutorial from A Hoot and a Holler.
Child’s Artwork Tote Bag from The Long Thread.
Dress-up Crown from The Long Thread.

SEWING ACCESSORIES

Hex Pincushions from A Stitch in Dye.*
Miniature Patchwork Pincushions from The Purl Bee.
Knit Pincushion from Kristin Roach for Craft.
Wrist Pincushion from The Long Thread.

FOR THE HOME

Log Cabin Wash Cloths from The Purl Bee.*
Bed Caddy Organizer from Sew4Home.
Fabric Scrap Bowl from Linda Permann at Craft Stylish.
Reversible Tissue Box Cover from Pink Penguin.
Summer Tweets Bird Mobile from The Red Thread.
Yarn Basket from A Friend to Knit With.
Knot Trivet from Design Sponge.
Anneli’s Rag Pillows from Design Sponge.
Portrait Bookmarks with Amanda Blake Soule for Mothering magazine.
2010 Tea Towel Calendar from Just Something I Made for Dollar Store Crafts.
Magazine Paper Decorations from Jeffery Rudell for CraftStylish.
DIY Cake Stand from Tangarang.
Reversible Wine & Gift Bags from Sew4Home.
Paper Wine Bag from Daisy Janie.
Little Pink House Embroidery Hoop Frame from Checkout Girl for Sew, Mama, Sew!
Nesting Boxes from Oh, Fransson! for Sew, Mama, Sew!
Pintuck Pillows from The Long Thread.
Crooked Coasters from The Long Thread.
Cereal Box Journals from The Long Thread.

TECHNIQUES & STITCHING

Stitch-a-Day from the Hand Embroidery Network.
Stencil and Potato Printing with Lotta Jansdotter for CraftStylish.
Little Mushroom Girl Embroidery Pattern from One Red Robin.

HOLIDAYS

Mushroom Ornament from Cathy Gaubert.
Doily Window Decorations from Martha Stewart.
Little Forest Quilt from The Purl Bee.
Cereal Box Cardboard Houses from Bella Dia.*
Surprise Ball Ornaments from Skip to my Lou.
Furoshiki Basics from Etsy’s The Storque.
Book Wreath from Living with Lindsay.
Felt Balls Wreath from Pickles.
Yarn Gift Tag from A Little Hut.
Christmas in July Advent Calendar from Elizabeth of Oh Fransson! for Sew, Mama, Sew!
Sweater Stocking from The Long Thread.
Felt Ornaments from My Fantastic Toys.*
Winter Holiday Decorations from Wisecraft for Value Village.
Easter Basket adapted from a Zakka Sewing pattern, from Disdressed.
Spring Basket from Maya Made.
Felted Egg Tutorial from Wool Pets.
Fabric Easter Eggs from Retro Mama.
Fabric Pompoms from Once Wed.
Candy Corn Cone from Zakka Life.
Jack O’Lantern Hoop from Betz White.
Paper Bag Halloween Bowls from The Long Thread.
Valentine’s Day Heart Plush Toy from The Long Thread.


Why Are Orcas Attacking Boats?

Recently I have been reading articles and news about Orcas attacking boats and causing quite a bit of anxiety.  Since these whales hunt in p...